Drywall, otherwise known as plasterboard, wallboard, or sheetrock, is a sheet of calcium sulfate dehydrate typically used in interior walls and ceilings. The plaster is typically mixed with something to reduce water absorption, flammability, and mildew.
Installing drywall around a shower is a good option to reduce damage from water supply and splashes. Normal walls will decay within mere months, whereas drywalled surfaces will survive for much longer. Here I’ve talked about Install Shower Drain in details.
The process of drywalling around a shower surround consists of selecting high-quality drywall and gathering all the tools you will need for installation. Always measure with a good tape. After you are done with measuring, transfer the measurement into the drywall piece. Cut according to the measurement and smooth out the rough edges. Lastly, place them in your measured wall, tubs, or shower surround and nail it with screws. Using a screw gun will ensure maximum accuracy.
This article will help you to understand how to install drywall around a shower surround. You will need a list of tools, but the majority of them are usually found in every home. You can also understand how to drywall around a tub surround and tub edge. The process is very similar.
Tools That You Will Need:
- Screwdriver set.
- Chalk Line.
- Drill.
- Hammer.
- Level.
- Pry Bar.
- Safety glasses.
- Ladder.
- T-square.
- Tapes.
- Knife.
How To Drywall Around A Shower Surround: Step by Step Instructions
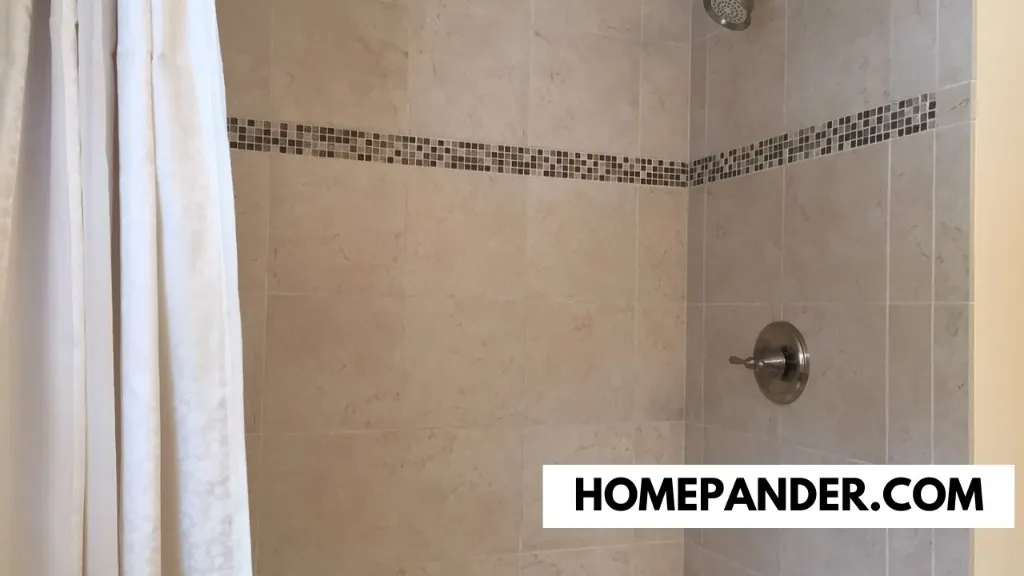
To Install drywall wherever you want, whether in a shower surround or your entire bathroom/kitchen, follow these steps:
Step 1: Select The Drywall Of Your Choice
There are usually three basic types of drywall. You can order them on the cheap through Amazon too. However, for humid areas, it is logical to use Waterproofs drywalls. They are usually half-inch thick. If mold is a concern where you live, you can opt for Water-resistant mold-proof ones.
Step 2: Measure The Area
Measure the area carefully with tape. Write down the measurements. You want to measure from the ceiling to the joist and cut the sheet to length. You will also have to mark fastening guidelines within every 16 inches. You have to cut overall lengths a quarter of an inch shorter for easier fitting.
Step 3: Score, Snap The Drywall And Smoothen The Edges
Measure the length accurately and use a knife to score the paper facing side. After scoring, use a quick snap to get the measured drywall piece. At this point, the piece will have rough edges. You have to smooth it out. Otherwise, you will not have tight joints. Using a surform tool for smoothing is a good choice.
I like the Stanley Surform Shaver for this purpose. It is very lightweight and easy to use.
Step 4: Place The Drywall
Now it is time to place the drywall piece in place. For ceilings, it is better to use a 2×2 crutch for the majority of the weight. Otherwise, just hold them. For bottom pieces, use a lever. Tuck them underneath and press the lever for better and tight joints.
Step 5: Secure The Drywall With Screws
Place your nails and screws a little bit under the paper surface. You have to be careful not to break the gypsum core. Position the fasteners close to the openings in order to hide them. Preferably use a screw gun for accuracy.
Pro Tip:
- Gaps at ends and slices should be less than ¼ inch.
- Use at least 5 fasteners per framing member—one at each of the edges and three others with 12-inch gaps between them.
- Always use 1-1/4 inch fasteners for a ½ inch board and 1-5/8 inch fasteners for a 5/8 inch board.
Related Questions
Do You Put Drywall Behind A Shower Surround?
It is always better to use water-resistant drywalls in high humid areas such as a bathroom, kitchen, or basement. Yes, you can and should put drywall behind a shower surround. According to Homesguide, You can set an acrylic or fiberglass enclosure behind the space with nailing flange flushes against the studs. After that, you may how to install the surround bathtub on drywall.
Drywall Around The Tub Edge
According to FineHomeBuilding, using a drywall shim suffices. But the consensus is not the same on this occasion. Many suggest against having drywall at tub edges. Here is something to follow if you want to install drywall around the tub edge.
Firstly, if the wall flanges are 1/8” further back, you can pre-fill the gap using drywall mud. This may take some time and much more coating, but your drywall will have cracks on it if you do not fill it. Secondly, if the flanges are flush or further back, you can install a tile border around them.
How To Drywall Around The Tub Surround?
There are specialized drywalls for tub surrounds. You have to follow the same guidelines for shower surrounds but screw fasteners in closing gaps to ensure tighter fittings. Tubs are going to be in water contact for a significantly more amount of time. Therefore using high-quality waterproof drywall is a must.
How To Fill The Gap Between Shower Surround And Drywall?
You can use mud coating and pudding to fill the gaps, if there are any. You can also consider using a plastic piece to fill a gap. Use powerful glue or nails to keep it in place. Many prefer using mud for safety and durability, but there is no reason not to use a plastic piece.
How Do You Finish A Wall Over A Shower Surround?
First of all, you can use the tile already on the place. But for safety and aesthetics, putting drywall is an option too. In that case, cover the wall with waterproof paint and then measure the wall with tape. Cut your drywall accordingly and attach it with nails and screws. If you have problems with exposed flanges, a good way to hide them is to put the finished drywall around shower over them.
In Conclusion
Through this article, you can drywall your shower surround all by yourself. But it is always advised to seek professional help to avoid hazards. Plumbers nowadays cover every kind of drywall installation. Drywalling shower surround, therefore, will take very little time.
The drywall can be an excellent way to provide safety to your bathroom walls and prevent decaying or molds. Drywalls can also enhance the aesthetics. Always use certified drywall products to ensure maximum quality.


![How To Clean Dark Grout That Has Turned White [5 Easy Ways]](https://homepander.com/wp-content/uploads/2021/12/How-To-Clean-Dark-Grout-That-Has-Turned-White.webp)

![How to Remove Crystallized Urine [Explained]](https://homepander.com/wp-content/uploads/2022/02/How-To-Remove-Crystallized-Urine.jpg)
