It’s always frustrating to spend several hours of unsuccessful attempts at solving your toilet overflow tube cracked.
If you don’t know how to solve the issue and don’t use the right tools and equipment. Then it’s obvious that you’ll fail.
But congrats, as at least you have tried. Many people won’t even try. However, there are two ways of fixing your cracked toilet overflow tube.
Applying waterproof silicone caulks in the crack is the easiest way as it repairs the crack and fixes the leaking water issue. But if the tube has too many cracks, using caulks won’t be worthwhile. In that case, replacing a new tube is the ultimate solution.
But how to do it? Don’t fret, as this post will describe all the step-by-step instructions to use silicone caulk or change the old toilet overflow tube.
| Aspect | PVC Overflow Tube | Brass Overflow Tube |
|---|---|---|
| Material | PVC plastic | Brass metal |
| Durability | Prone to cracking | Highly durable |
| Resistance to Corrosion | Resistant | Resistant |
| Cost | Inexpensive | More expensive |
| Installation | Easy to install | May require soldering |
| Maintenance | Low maintenance | Low maintenance |
| Replacement | Often requires replacement | Rarely needs replacement |
| Flexibility | More flexible | Less flexible |
| Compatibility | Fits most toilets | May require adapters |
Why Is The Toilet Overflow Tube Crack?
Before solving a problem, it’s a good practice to investigate its reasons. It’ll help you to understand the problem’s importance. For example, after getting deep down, we have found 4 significant causes of cracking the toilet overflow tube.
- The toilet flush is used frequently during the day. So in a year, the toilet flush is used countless times. So when time passes, it isn’t surprising to crack the toilet overflow tube.
- It may crack due to the nature of your toilet water supply.
- The habit of pushing the flushing button is another reason behind the cracks.
- The quality of the toilet overflow tube is also considerable for cracking.
How To Fix The Cracked Toilet Overflow Tube?
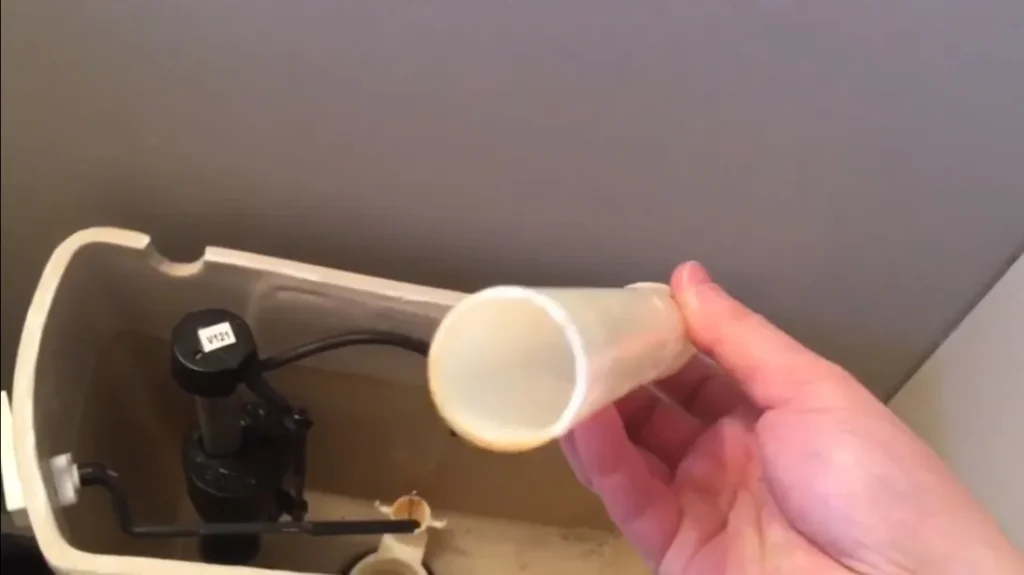
You can easily minimize the cracked leaks with silicone bathtub caulk. Anybody can do it, as it won’t require high skill and more than 30 minutes.
The Things You’ll Need
- A sponge and a dry rag
- 40-grit sandpaper
- A bathtub caulk
- A putty knife
Project overview
- Estimated cost- $20-$30
- Required time- 30 minutes
- Skill Level- Beginner
Step 1: Shut off the water supply
Below the water tank, you’ll see a knob. Turn it clockwise to shut off the water supply line that provides water into the tank.
Step 2: Drain the water
Flush the toilet to drain the toilet from the tank. If you find a little water after flushing, wipe the tank with a sponge and squeeze it to remove the water. Repeat the process until the tank is empty.
Step 3: Cleaning and sanding
Again wipe the tank with a dry rag, especially the tube that you want to fix. Ensure the tube is completely dry. Take 40-grit sandpaper and fold it in a double layer. Gently sand the cracked area with sandpaper to rough the space. Don’t sand the entire tube, as it will scratch.
Step 4: Wipe the tube
After sanding the tube, you’ll find a lot of porcelain particles. The bath cluck won’t effectively work if you apply it with these particles. So wipe the tube with a dry rag to remove any dry debris from the tube.
Step 5: Apply the bathtub caulk
Unscrew the Gorilla bathtub caulk cap and adjust its application nozzle. Cut the nozzle with a cutter according to your desired shape. Now, apply the silicone caulk to the cracked toilet overflow tube by holding it at a 45° angle. Use a putty knife or a spreader to enter the caulk into the cracks to cover them.
Repeat the work until you apply all the cracked areas. After completing the task, if there is more caulk in the tube, wipe the nozzle with a soft rag and open it. Reattach the cap and store the caulk tube in your toolbox for further use.
Step 6: Wait to cure
It takes around 15-30 minutes to dry off. But, you must wait at least 24 hours for a complete cure.
Step 7: Test the toilet
After fully curing the silicone caulk, turn on the toilet water supply by turning the handle counterclockwise. Next, refill the toilet tank and push the flush button to check whether the tube is fixed and the flush is ok.
If yes, glad for your success. But if not, there are probably major cracks, and you should replace the tube.
Toilet Overflow Tube Replacement Instructions
If, at first glance, you can determine the toilet overflow tube cracks and realize that it should be replaced. We suggest you not follow the above tricks. Instead, initially, it’s better to take steps for replacement.
Let’s admit it, changing the tube is a longer process than applying caulk, but not difficult. However, you can handle it alone and need some DIY skills, supplies, and patience. That’s all.
However, you have to buy the tube knowing the existing tube types and its length to avoid toilet overflow tube too short hassle. So that you can easily match the new tube with your toilet overflow tube extension.
Types of Toilet Overflow Tube
There are five different toilet overflow tubes available in the market. Your existing one must be anyone among them. So let’s learn the five kinds of toilet overflow tubes.
1. Piston or plunger type overflow tube
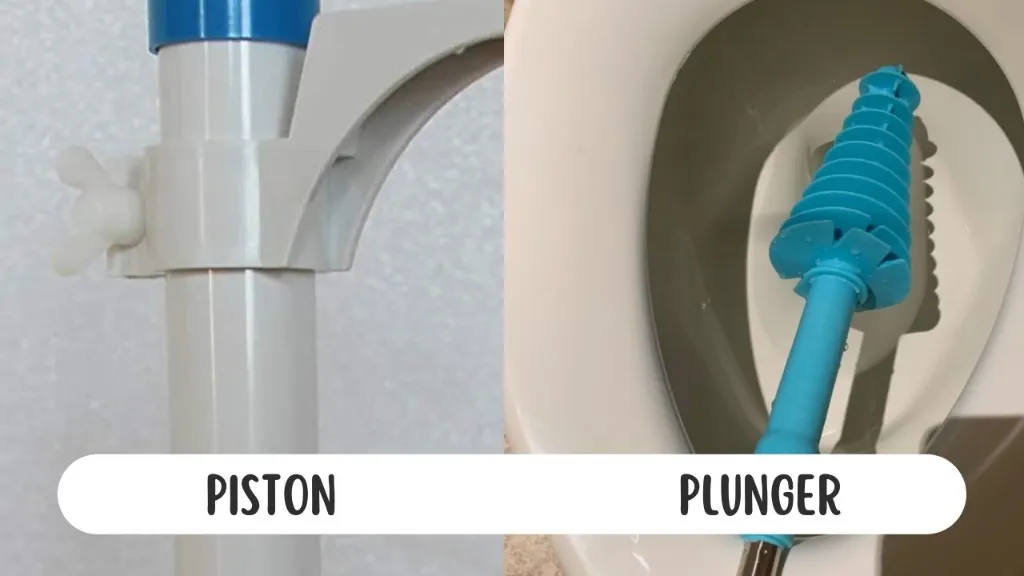
These types of tubes are made with heavy-duty cast brass. So they’re designed following the earliest style, durable, and ensure flawless operation.
2. Brass body diaphragm type overflow tube

You’ll find this type of toilet overflow tube in the old model toilets. Its tube body, cap, and bonnet are made with cast brass. But the diaphragm button is made of plastic.
3. Plastic body diaphragm type overflow tube

Most new-style toilet overflow tubes are made from plastic and anti-siphon diaphragm ballcocks. Though they are plastic made, they qualify as the same as the true ballcock.
4. Float cup type overflow tube

These tubes are connected with an O-shaped cup. When flushing the toilet, it’ll move up and down to operate the flushing system.
5. Float-less type overflow tube
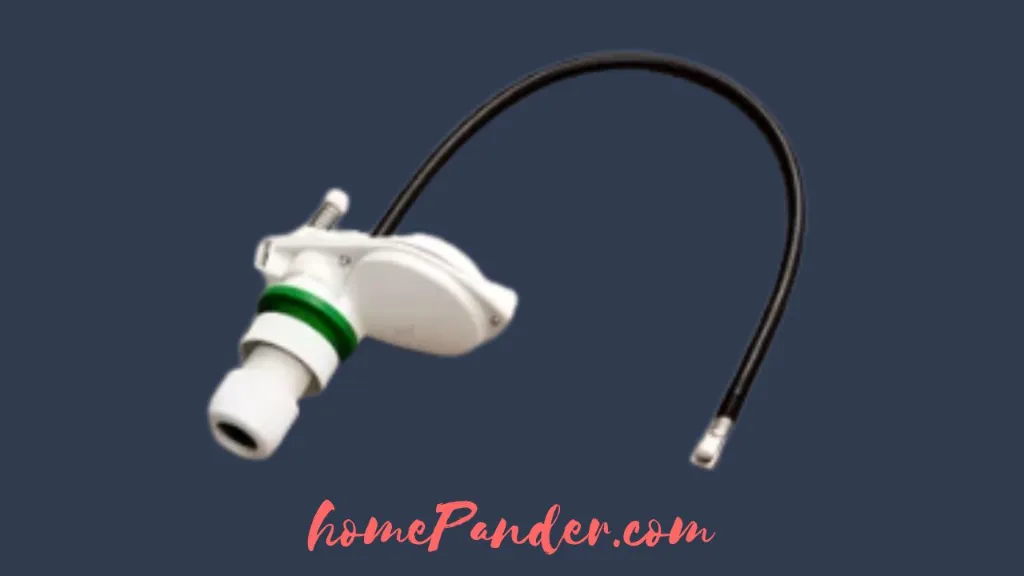
These types of fill tubes are the new invention of the toilet industry. They are made of plastic and work through a pressure-sensing mechanism diaphragm instead of using a floating device.
So now you know the tube types and can buy the tube according to your toilet requirement.
Let’s make a checklist of what you need to replace the toilet overflow tube. Once you prepare the things, your task will be half done.
The Things You’ll Need
- Rubber hand gloves
- Boots
- A sponge
- A flat screwdriver
- An adjustable wrench
- A towel
- Toilet overflow tube (That matches your old one)
- Toilet retaining nuts
Project overview
- Estimated cost- Below $50
- Required time- 60 minutes
- Skill level- Beginner
Step 1: Wear safety gears
Naturally, your toilet tank won’t be as pristine as new. There you’ll find a lot of water stains, scummy surfaces, and corrosion. So you should wear rubber hand gloves and boots before starting your DIY job.
Step 2: Disconnect the water supply hose
If the toilet tank is full of water, you can’t start working. That’s why you must disconnect the water supply hose line to stop passing water into the tank.
Step 3: Drain the water
Flush the toilet to drain the tank’s water through the toilet bowl and rim. If there is more water in the tank, wipe the tank with a rag or sponge to soak up the excess water.
Step 4: Unscrew the tank
Since you need to reach the bottom of the tank to replace the tube, you should remove the entire tank from the toilet bowl. You’ll find two bolts at the tank’s bottom by which the tank is secured with the toilet bowl.
Steadily hold one bolt’s head with a flat screwdriver, and use an adjustable wrench from beneath the bolt to unscrew it. Then, do the same thing to unscrew the next bolt.
Step 5: Remove the tank
Now carefully remove the tank and place it in a flat space. You can use a towel beneath the tank, as it’ll help you to avoid damage.
Step 6: Remove the flush valve
After that, you have to remove the valve from the bottom of the toilet reservoir. For this job, you should repeat the same process as you remove the tank.
Pull out the valve, keep it and the nuts in a safe place because you’ll need them when you reinstall the tank.
Step 7: Remove the tube
When you unscrew the bolts, there you’ll find a rubber-made gasket that will firmly attach the tube to the tank and prevent water leakage.
Turn it towards you to remove it. Then remove the old cracked tube that you want to replace.
Step 8: Install the new tube
Place the tube into the ship-on hole of the tank, and attach the gasket you removed earlier. If the gasket is too old, there is a high chance of leaking water after a few days.
It’s better to use a new toilet gasket as it isn’t expensive. The new gasket will cost you less than $25 and comes with 4 different dimensions toilet float adjustment screws.
Step 9: Screw the spud bolts and nuts
Place the bolts into the bolt space and manually tighten them as possible. Then, use the screwdriver and adjustable wrench to tighten the bolts, as they can firmly hold the overflow tube.
Step 10: Install the tank
Your one-piece toilet overflow tube replacement is done. Now, place the tank on the toilet bowl as it was and slide the bolts and nuts into the holes. Next, tighten the bolts and nuts with a screwdriver and wrench.
Never over-tighten them, as it may scratch the tank. However, when you tighten the bolts, the tank may wobble, but don’t worry. When you finish, that will be adequately secured.
Step 11: Reinstall the flapper
Reinstall the water overflow flapper with the tube By hooking the flapper to the posts, you can also do it. When reinstalling the flapper, ensure it sets inside the valve opening space. Now connect its flushing handle chain to work it like before.
Step 12: Checking its working
Reconnect the water supply hose pipe with the tank. Wait a few minutes to fill the tank with water. Then, push the flush button of the tank and check whether the flush is ok. If you can follow the steps correctly, you’ll succeed, the flush will be ok, and there will be no leakage of water seeping.
Fortunately, these step-by-step instructions will also help you to learn how to adjust the overflow tube in the toilet. Even this DIY job will save around $100-$300, as the plumber will charge approximately $170 to $350 including material and labor cost.
Best Tips To Keep Your Toilet Flushing System Healthy
- Don’t install cheap toilet accessories, as they won’t be long-lasting. As a result, you’ll find them scratching, cracking, leaking, or even breaking within a few days.
- Install the toilet with professional plumbers to get good service because they will handle the job with adequate caution and take care of your supplies. So there is less chance of damaging anything at the time of installation.
- If you have a hard water supply in your home, you should use a toilet water filtering system to make the water soft. So that the toilet system won’t be affected by the water contamination which comes with water.
A Comparison Table for Different Types of Toilet Tank Overflow Pipe
| Overflow Pipe Type | Material | Durability | Ease of Installation | Cost |
|---|---|---|---|---|
| Plastic | PVC or ABS plastic | Average | Easy | Low |
| Brass | Metal (brass) | High | Moderate | Moderate |
| Stainless Steel | Stainless steel | High | Moderate | High |
| Copper | Copper | High | Moderate | High |
Related Questions
[faq-schema id=”10471″]
Final Words
So now you know the process of fixing a cracked toilet overflow tube or replacing an old-style toilet fill valve.
As the work demands some patience, you should schedule the task when you have some time at hand. Because if you are in a hurry, there is a high chance that you may make mistakes in following the instructions, and the situation will be worse. So it’s wise to do it on a weekend.
Did you fix the issue? How was your experience? Let us know by leaving a few words in the comment section. Your words will inspire us to write about more DIY toilet respiring skills.


![How to Remove Crystallized Urine [Explained]](https://homepander.com/wp-content/uploads/2022/02/How-To-Remove-Crystallized-Urine.jpg)


![How To Clean Dark Grout That Has Turned White [5 Easy Ways]](https://homepander.com/wp-content/uploads/2021/12/How-To-Clean-Dark-Grout-That-Has-Turned-White.webp)