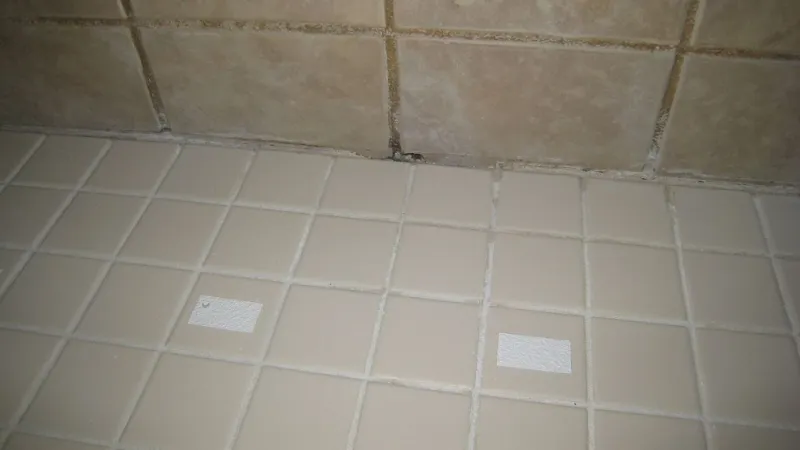
Seeing the grout washing away in the shower becomes a headache for homeowners. Especially when you newly applied the grout.
Not only does this cost you a lot of bucks for repairing or replacing the grout, but also it’s a hassle disrupting your busy life. So you need to identify why grout is washing away in shower?
Excessive moisture seeping through the grout and improper application of grout are the most crucial reasons. Otherwise, some common reasons are poorly applied seals or using too much polymer additive in the grout.
Whatever the reason is, every problem has a solution or multiple solutions. So we’ll discuss every reason behind washing off the grout in shower and how to overcome this issue. This easy detailed solution will save much time and money of yours.
We are not going to waste your time. Let’s reduce your bathroom suffering!
Why Is The Grout Washing Away In Shower?
| Method | Effectiveness | Difficulty | Cost | Time Required | Durability |
|---|---|---|---|---|---|
| Re-Grouting | High | Moderate | Medium | 1 – 2 days | Long-lasting |
| Grout Sealing | Moderate | Easy | Low | Few hours | Temporary |
| Epoxy Grout | Very High | Difficult | High | 2 – 3 days | Long-lasting |
| Grout Repair Pen | Low | Easy | Low | Few minutes | Temporary |
| Professional Service | High | Easy | Varies | 1 – 2 hours | Long-lasting |
It’s pretty challenging to know the specific reason behind why the grout washes away in the shower. However, we can assume several possible reasons you can find by observing the grout.
- Using Thinner Density Grout
Find out whether the technicians used powder or fast-drying grout for your shower tiles. As powder grouts require mixing water to form consistency, sometimes by chance the technicians might add too much water to the grout.
So when the grout was used in lighter consistency than it would have, the grout line of your shower gradually started to crack and break. As a result, it washes away with water flow.
- Excessive Moisture Seeping In
The next most possible reason for peeling off the grout is too much moisture that might seep into the grout lines. Remember that the moisture and grout don’t get along.
If the grout has some tiny and porous parts, the moisture easily gets trapped inside them. Therefore, moisture begins to build up mold and mildew and causes premature disintegration of the grout.
It typically happens if the grout is not sealed or when the sealant didn’t penetrate properly underneath the grout’s surface. This issue will arise more quickly if your bathroom has a humid environment.
You can determine this issue by checking the ceiling below your bathroom if you see stains there. Or test grout if they look visibly crumbling or cracked. If you find these signs, you should replace the grout fast.
- Grout Is Not Applied In Correct Amount
The grout should be applied with a trowel in a certain adequate amount and with the proper technique. If grout was spread thinly, the product eventually crumbled and fell out. Otherwise, applying too much grout makes you spend extra time removing extra grout from the tiles.
Nevertheless, sometimes the technician also did not deeply press the grout. So that it couldn’t enter the proper amount into the joints. As a result, it creates a bridge between the grout lines. That’s a common issue if you hire inexperienced grout installers.
- Insufficient Timing For Curing Grout
Did you give enough time to the grout for curing? The grout must be hardened perfectly to ensure it will not cause water damage. If a product like grout doesn’t get the proper amount of time to be solid, no wonder it can damage and gradually fall out.
- Using Excessive Polymer Additive
If you hire beginner technicians or inexperienced home improvement contractors, they might accidentally use excessive amounts of a specific type of additive to the grout. Thus, excess evaporation allows the formation of pinholes on the surface. As a result, it leads to cracking and peeling off the grout.
- Poorly Sealed Grout
You must use an excellent sealant to seal the grout after installment because sealant prevents moisture and liquids from absorbing into the grout line.
However, the sealing idea is excellent for preventing staining on it, but sometimes if it is not epoxy-based grout and not sealed properly, it can cause crack and begin to wash away over time.
Though it’s pretty tricky to find the poorly sealed grout, once you notice the grout begins to develop mold or face discoloration issues, then understand it’s time to treat your grout. And the most effective way to treat this problem is to clean the grout.
- Using Harsh Cleaners
You mostly ignore that cleaners can also be responsible for the fall out of the grout. This is so true when you clean your shower tiles and grout with harsh cleaning chemicals such as pneumonia and vinegar. These ingredients effectively break down the sealant over the grout, and beneath the surface becomes exposed. In that case, you should repair or replace the grout and stop using the harsh chemicals immediately!
- Time Worn Grout
If you installed your shower tiles long ago, the shower grout might wear out due to its simple wear and tear over time. So when you see the grout become stained, discolored, dull, and unusable, replace it soon. Otherwise, your shower tiles also lead to water damage.
When Should You Replace Grout?
Give a good observation over the grout. The grout running through the shower water might not last long. This grout is so powdery that you can’t save it anyhow, and you must dig out the old grout.
How To solve Grout Washing Away In Shower
No matter what causes the grout to wash away, ultimately, you end up repairing it or, in most cases, replacing the grout.
So here we write 2 methods for fixing or adequately replacing your shower grout. You won’t face any further issues in the future, once you follow these methods based on your grout requirements.
Method 1: How to repair grout in the shower
If the grout is not in that bad condition or washed away for poor sealing, you can quickly fix the grout in the shower. The most effective way to treat this problem is to clean and reseal the grout.
As you have first to clean the grout and then reseal, we describe the process separately on how to fix the grout in a shower.
Part A: cleaning
In this part, we’ll talk about the grout cleaning procedure.
The Things You’ll Need
- 2 cups bicarbonate
- 1 cup water
- 1 cup white vinegar
- A spray bottle
- A old toothbrush
- A stiff bristle grout brush
- A grout sponge
Project Overview
- Estimated Cost- $0
- Total Time- 12 hours
- Yield- 30 square feet
- Skilled Level- Beginner
Step 1: Make a paste and apply
First, you have to make a solution or paste by mixing bicarbonate and water. Now apply the paste to the poorly sealed dirty grout with the help of an old toothbrush and rub the space back and forth.
Step 2: Apply vinegar
If the grout has stubborn stains and grime, only the bicarbonate solution won’t be effective. So you have to apply vinegar to make the cleaner stronger.
Pour white vinegar into the spray bottle and lightly spray it on the grouts where you have applied the paste. Wait a few minutes to let the vinegar loosen the stains.
Step 3: Rubbing the grout
Gently rub the grout with the stiff bristle grout brush until these are completely clean. Rinse the grout space with plain water to clean the solution scum and stains particles.
Step 4: Completely dry the grout
Wipe the grouts with the grout sponge to remove the excess water. If there is more water, squeeze the sponge and repeat the process.
You have to wait 24 hours to dry the grout completely. Because if the grout isn’t properly dried the sealant won’t sit on the grout that lasts long.
Tip: If you don’t have time to make and use the homemade grout cleaner, the commercial grout cleaning solution can be a good option. In that case, you can use BrandBlack Diamond Stoneworks grout cleaner, which is acid-free, and applicable on Ceramic, Marble, white and color grout. So it ensures fast cleaning with no boundaries to use.
Part B: Resealing
Once you have done cleaning the grout, it’s time to reseal them to prevent washing.
The Things You’ll Need
- A shower grout sealer
- A clean microfiber cloth
Project Overview
- Estimated Cost- $15 to $20
- Total Time- 12 hours
- Yield- 30 square feet
- Skilled Level- Beginner
Step 1: Choose the suitable grout sealer
You can use any shower grout sealer. But we recommend using the FILA Grout Sealer. Because it is easy to use, protects the cementitious grout joints from water and humidity, prevents stains, and offers grout-proof sealing. Moreover, it keeps your grout looking new for years.
Step 2: Apply grout sealer
Shake the grout sealer spray bottle before applying it to the grout to penetrate it. Then spray the sealer around 10-15 inches from the shower’s tile and grout surface. Repeating the process apply the sealer to all the shower grout from where the grout was washed.
Step 3: Wait to dry the sealer
Now, you have nothing to do instead of waiting 2-4 hours to let the grout sealer dry.
Step 4: Checking the sealer
Drop a few drops of water on the grouts to check whether the water washes away the sealer or not. If yes, apply a second coat of sealer. But hopefully, it won’t as you use the best grout sealer. Finally, allow your grout more than 8 hours to dry the sealer to make it grout-proof.
That’s all how to reseal grout and fix this disgusting grout washing issue.
Method 2: How To Replace Grout In Shower
If the grout is washed away for insufficient timing to cure grout or time worn out, you must replace the grout instead of resealing it. Because resealing won’t be worth it.
In this process, you also have to perform two layers of activities. The first is taking preparation, and the second is replacing the grout. Here we also keep the two parts of activities separated for your convenience.
Part A: Preparation
Since, replacing the shower grout is a vast task, you have to take some preparation to make the job easier.
The Things You’ll Need
- A measurement tape
Project Overview
- Estimated Cost- $0
- Total Time- 1 hour
- Yield- 30 square feet
- Skilled Level- Beginner
Step 1: Check For Loose Tiles
First, ensure you have no loose tiles or a structural fault in your shower. If there is any, the grout easily dissolves in water no matter how well you apply them.
Otherwise, applying new grouts also doesn’t solve the problem as the loose tile doesn’t let the grout settle. So, start assessing the structural integrity of every shower tile. Each tile should be in place, stable and intact. If you find any loose tiles, consider replacing them.
Once you assure the tile foundation is in good shape, now test the shower grout to see whether the grout is washing away in the shower further and needs to be replaced or not.
Step 2: Choose The Replacement Grout
Grout comes in two different varieties; sanded and unsanded. Measure the gaps between tiles with the measurement tape. If it is less than ⅛ inch, you’ll require unsanded grout. But gaps greater than ⅛ inch should be filled with sanded grout.
Even you have options to choose between epoxy grout or acrylic latex grout. The difference between the two is that epoxy grout is quite challenging to apply but greatly resists future stains and doesn’t need to use any sealant. Whereas the acrylic latex grout is very easy to apply, you should seal it to ensure protection. However lastly, select a grout color that matches your previous grout in the shower.
Step 3: Thoroughly Clean The Grout
You should give your old grout a good cleaning so the area can be clean and bacteria-free.
- Mix white vinegar and water in a 1:1 ratio to make a cleaning solution.
- Next, with this cleaning solution, scrub the old grout with a toothbrush or soft brush.
- Continue until you entirely remove the dirt.
- Lastly, rinse off the grout with clean water and wipe dry.
Part B: Grout Replacement
In this section, we’ll share the guideline of replacing shower grouts.
Tools You’ll Need
- Grout (That suits your shower best)
- Dust Mask
- Safety glasses
- Reciprocating saw, or grout saw
- Utility knife with a dull blade
- Grout sponge
- Grout float
- Shop vacuum
Material You’ll Need
- Garbage bag
- Grout sponge
Project Overview
- Total Time- 2-3 days (Removing old grout to letting new grout dry)
- Estimated Cost- $150-$200
- Yield- 30 square feet
- Skilled Level- Beginner
Step 1: Remove The Grout Groove
First, wear a dust mask to prevent dust from entering your nostrils and put on safety glasses to protect your eyes. If you already have a reciprocating saw, use it as a grout removal tool.
But if you don’t have a reciprocating saw, you should buy a grout saw to remove the grout. Work the tool back and forth carefully in the grout groove. Remove the ⅛-inch layer of old grout using the saw.
Step 2: Clean Up With A Utility Knife
If any tiny bit of grout didn’t come out, scrape them with a utility knife with its dull edge. There is no use of a sharp edge to scrape the grout. Rather a flat blade won’t risk you any injury accidentally.
Step 3: Vacuum and Remove The Grout
After grinding off the top layer of your old shower grout, take a shop vacuum. Put the big chunks of grout into a garbage bag. Afterward, vacuum the tiles and grout lines to remove the remaining debris and scraps.
Take a wet grout sponge and wipe the shower tiles to get the moisture out of the grout. This procedure will allow you to remove the remaining dirt and make the new grout look sparkling clean. Let the bathroom dry and vacuum everything again.
Step 4: Apply The New Grout Pack
Once your shower is completely dry, it’s time to apply the new pack. In the preparation section, we have talked about different types of grout. You should choose anyone that fits your shower’s old tiles.
Scoop enough amount of grout onto the grout float. A grout float is a thick rubber pad used for applying grout.
Next, spread the grout equally into the grout lines. Work carefully and slowly to ensure all the grout lines are appropriately filled. Therefore, slowly drag an unfilled grout floor across the tile surface at a 45-degree angle to scrape off excess grout. Wait 30 minutes until the grout starts drying.
Step 5: Clean The Tile Surface
Dip a sponge into water and wiring it to remove excess water. Next, lightly run the sponge over the tiles to wipe the grout off. If needed, rinse the sponge and wipe the tiles until clean.
If you use epoxy grout, you might require a scrubber sponge to remove the hazy residue from the tiles. Afterward, let dry the grout according to the manufacturer’s instructions.
After drying, wipe the tile with a clean and dry cloth to remove lingering residue. However, for the acrylic latex grout, consider applying a sealant. Allow it to dry for up to 48 hours.
Step 6: Put Some Waterproof Grout Sealant
If you’re using old or synthetic grout like acrylic latex, apply a waterproof sealer after the grout has completely dried. Applying a suitable sealant is very practical and helpful in restoring the look of your grout and keeping the tile new. Plus, you’ll want to give enough time for the waterproof sealant to work effectively.
You can try an impregnating sealer because it can penetrate well below the surface of the grout and ensure enough protection against moisture.
- Pick a high-grade waterproof sealant
- Apply the sealant evenly over the grout
- Take sufficient time to make it properly solid
Grout Replacement Cost In Shower
cost to replace grout in shower
| Service Provider | Average Cost (per square foot) | Material Included | Labor Included | Warranty | Time Required (for standard shower) |
|---|---|---|---|---|---|
| Local Handyman | $2 – $5 | No | Yes | Varies | 1 – 2 days |
| Professional Tiler | $4 – $8 | Yes | Yes | 1 – 5 years | 1 – 2 days |
| Grout Specialist | $6 – $12 | Yes | Yes | 5 – 10 years | 1 – 2 days |
| Tile and Grout Company | $8 – $15 | Yes | Yes | 10 – 15 years | 1 – 3 days |
| DIY (Do It Yourself) | $1 – $3 | No | N/A | N/A | 2 – 3 days |
You may think that replacing your shower grout requires buying many tools and materials as well as needing 2-3 work days. So it’s better to hire professionals to do the job. Here we show you how much it costs for shower grout replacement. So that you can justify the cost and whether the time that you spend is worth it or not.
Though the cost may vary depending on your location, the professional labor charge, and materials quality, the national average grout replacement cost will be $17.34 per square foot. That means you have to spend $17.34*30= $520.
Whereas if you have done the job, it costs you around $200, and you can save $320, which is good. Even the tools you buy can be used in the future. This means DIY grout replacement is worth it.
How To Maintain Grout Shower?
To maintain your shower grout and tile clean and beautiful, you should focus on keeping the grout clean. The grout is light-colored, so they tend to be dirty and stained rather than tiles. Maintaining your shower grout extends its lifetime and protects it from being cracked or damaged. Fortunately, a standard cleaning method can help keep the grout shiny.
- Everyday Cleaning
Using a squeegee and spray every time you take a shower or bath saves tons of work and time in the long run. If you follow this simple daily cleaning trick, you don’t need to spend a lot of time scrubbing your bathroom tiles. Here are the two simple steps for your everyday routine.
- Run a good squeegee over the tile, grout, glass walls, and doors to remove excess water so that the components won’t get any water stained.
- Take a mild daily shower cleaner and spray lightly on the tile and glass.
Tips: If you don’t have any commercial mild shower cleaner, there is a DIY hack for you. Mix 4:1 to water and vinegar in a spray bottle and use it as your simple shower cleaner solution.
- Weekly Cleaning
Without a weekly deep cleaning of your shower and bath, your everyday cleaning effort will fail. Because the squeegeeing and spraying are not enough to prevent the soap scum or body oil from clinging to the surfaces.
- Make water and baking soda paste
- Rub the paste into the grout using a grout brush, or you can use a toothbrush
- Next, rinse the grout with clean water
- Rinse with hydrogen peroxide instead of water if the grout is more strained than usual
Tips: If you regularly use vinegar as a daily spray, make sure you wash the vinegar thoroughly before applying hydrogen peroxide.
- Reduce Moisture With Fans
An extremely humid bathroom can also be responsible for causing severe stains, discoloration, mold, and bacteria growth. In that case, always keep your bathroom window open to get enough ventilation. Or use a vent fan to reduce humidity.
- Change Your Regular Shower Products
Check out what ingredients are used in your shower products. Because sometimes, products are also responsible for leading stains on the grout. If your regular shower products, such as shampoo or soap, have artificial colors or dyes, consider switching to natural products.
Can You Shower With Unsealed Grout?
Yes, you can shower with unsealed grout if you use epoxy-based grout, as it naturally repels the water in the shower. But for the traditional grout, which contains sand, using a sealant is compulsory. Sealing tile grout protects your shower grout from absorbing moisture and unusual chemicals that cause the grout to crack.
Nevertheless, applying a seal won’t cost you much time or money. On top, the sealer prevents dirt, mold, and mildew. And at the end of the day, you’ll be relaxed about the safety of your shower tile.
How To Keep White Grout Clean In Shower?
Grout is mostly porous and absorbent. That’s why keeping white grout clean in the shower for the long term should be a daily practice. Therefore, white grout tends to be dirtier. So give your white grout a good squeegeeing after every shower. Maintain a weekly schedule following some simple steps we shared below.
- Rinse the grout with hot water to remove dirt, grime, or surface-level stains
- Make a soapy water mixture and apply it to the grout
- Using a soft brush, toothbrush or sponge, gently scrub over the grout to remove further stains
- If the soapy water tricks don’t do the job, try a pH-balanced cleaner
How To Keep Shower Grout Clean When They Are Seriously Stained?
If you ignore your grout for so long, the grout can become seriously stained or grimy, and the regular shower cleaner or baking soda paste won’t work anymore. At such a point, using bleach can help you to get rid of the stains.
Using a bleach pen will be effective if you don’t need to clean the entire bathroom and only remove the stains from small surfaces. A bleach pen is easily applicable in the grout and minimizes potential contact with shower tile.
But for cleaning the entire bathroom grout, use an oxygen-type powder bleach. Apply the bleach with a brush, let it rest for 10-15 minutes, and lastly, rinse off with clean water.
Related Questions
Can I Put New Grout Over Old Grout?
Yes, you can put new grout on the old grout. But first, you should consider the height of the grout. If the old grout is too high, you can’t pack the grout properly into the ground joints. If you give pressure to fit the grout, it will spill over on top of the surrounding tiles and gradually crack and wash away.
Do You Have To Remove All Grout When Regrouting?
No. It’s not always necessary to remove all the grout while re-grouting. In some cases, you need to remove the partial grout. However, if the grout’s condition is terrible and the problem is under the tiles, then it’s compulsory to remove all the grout. However, eliminating dirty grout before applying new grout is wise to make it effective.
Can You Touch Up Grout After It Dries?
Of course, you can. You might thinly apply the grout and realize you should increase the height of the grout line; at such a point, you can undoubtedly touch it up. But make sure you’re using a similar grout while reapplying the new grout over the older layer.
What Causes Grout To Crack While Drying?
Several reasons cause grout to crack when it dries. The most common reasons are excessive moisture that seeps into the grout, wrong grout mixture, grout not being packed correctly, using low-quality grout, etc.
In some cases, you need to remove the old grout by scraping it off and then reapply the grout in the entire area. Make sure you re-grouted the site using the correct application method and proper mixing techniques.
Does Bleach Damage Shower Grout?
Sometimes bleach can damage shower grout if you’re not careful. Using too much bleach can strip grout color away, plus make it uneven. Also, bleach weakens the grout, so it begins to crack and crumble.
Can You bathroom grout replacement?
Yes, you can replace bathroom grout. It involves removing the old grout, cleaning the area, and applying new grout to ensure a fresh and waterproof seal.
Take Away
Hopefully, you’re now relieved after identifying the reasons behind the grout washing away in the shower. Following our complete grout fixing guidelines, you can now fix and replace the grout yourself. Call a professional tile guy to help you if it seems challenging or fails to fix.
Good luck in saving your grout from washing away!


![How To Clean Dark Grout That Has Turned White [5 Easy Ways]](https://homepander.com/wp-content/uploads/2021/12/How-To-Clean-Dark-Grout-That-Has-Turned-White.webp)

![How to Remove Crystallized Urine [Explained]](https://homepander.com/wp-content/uploads/2022/02/How-To-Remove-Crystallized-Urine.jpg)