The most difficult challenge we face while cleaning mold from tiles is cleaning the grout lines that surround a block of tile. So, we decided to dedicate an entire article to demonstrate how to clean bathroom grout mold.
You can clean bathroom grout mold using an assortment of household cooking ingredients and chemicals. Commercial anti-mold formulas are also available for cleaning bathroom grout mold.
In the rest of this feature, we will introduce you to some of the most effective cleaning methods that will make your bathroom grout mold-free. We believe prevention is better than cure. Therefore, we will also shed light on what you can do to keep mold and mildew from growing in your bathroom grouts.
Things You Need
- Bleach/ borax/ baking soda/
- Old toothbrush/ power scrubber
- Sponge scrubber
- Anti-mold spray
- Gloves
- Safety goggles
- Mask
How To Clean Bathroom Grout Mold
| Method | Materials Needed | Difficulty | Effectiveness | Time Required |
|---|---|---|---|---|
| Baking Soda & Vinegar | Baking soda, white vinegar, water, scrub brush | Easy | Moderate | 30-45 minutes |
| Hydrogen Peroxide | Hydrogen peroxide, water, spray bottle, scrub brush | Easy | Effective | 15-30 minutes |
| Commercial Grout Cleaner | Grout cleaner product, scrub brush | Easy to Moderate | Highly Effective | As per product instructions |
| Steam Cleaner | Steam cleaner machine | Easy | Highly Effective | Varies based on machine size |
| Bleach (Caution: Use sparingly) | Bleach, water, scrub brush, gloves, mask | Moderate | Very Effective | 15-30 minutes |
| Natural Mold Cleaners | Tea tree oil, essential oils, water, spray bottle, scrub brush | Easy | Moderate | 30-45 minutes |
Using Hot Water
Step 1. Spray Hot Water
High temperature can accelerate the disintegration process of an element as it increases the intermolecular space between atoms and makes a substance more fragile. For this reason, Wikihow recommends using hot water while cleaning mold from grouts.
Take two cups in an electric kettle or a pot and heat it up to the point it starts boiling. Once the water begins to fizz, stop heating the water and take it into a sprayer bottle like Rayson Empty Spray Bottle.
Then, spray the water on the grout lines. You can also fill a bucket with hot water and pour it empty on the tiles. But, spraying would be more productive since it will be easier for the water to get into the grouts if you spray it.
Step 2. Scrub The Grout
Take an old used toothbrush. While choosing the toothbrush, check its bristles. If they are soft and come off with ease, it will not do you any good.
You can also use a power scrubber like the Rubbermaid Power Scrubber if you do not mind the expense.
Rub the grout lines back and forth with the toothbrush. If you are using a power scrubber, move it along the grout lines repeatedly. The mold should start to get off.
Step 3. Spray Anti-Mold Spray
For preventing future mold infestations, spray anti-mold spray on the grout lines. The MOLD ARMOR FG502 Mold and Mildew Killer + Quick Stain Remover is a perfect fit for this.
Baking Soda
Step 1. Mix Baking Soda And Water
Take a gallon of water in a bucket and drop half a cup of baking soda in it. Stir the mixture well with your hands.
Baking soda does not irritate the skin usually but is not entirely implausible. So, put on a pair of gloves anyway. When the solution is ready, take some into a sprayer bottle.
Step 2. Scrub The Tiles With A Baking Soda Soaked Sponge
Get yourself a sponge scrub and soak it in the baking soda mixture you had just made. Scrub the grouts with it vigorously.
As you are scrubbing, spray more solution on the grouts. After attending to all moldy grouts, leave them for 30 minutes.
The grouts should dry off within that time. After the waiting time passes, wash away the baking soda with warm water.
Step 3. Prepare A Baking Soda Paste
Now, you will have to create a thicker baking soda mixture like the ones we had mentioned in our bathroom mold article. Take half a cup of baking soda again and mix it with a few tablespoons of water.
You will get a baking soda afterward. Cover the mold-affected grout lines with it. Use a toothbrush to spread it along the lines.
Allow the paste to stay on the grout lines for at least 10 minutes before rinsing it off with warm water.
NOTE: You can use borax as an alternative. Use the same amount of borax as baking soda while creating the thin cleaning solution and the thicker paste.
Step 4. Spray Anti-Fungal Spray
Spray some anti-mold spray after removing the baking soda paste. You can rinse off the spray after 20/30 minutes.
Using Bleach
Step 1. Ensure Proper Ventilation & Protective Measures
Bleach creates toxic fumes, which is bad news for our respiratory tracts. So, ensure proper ventilation inside the bathroom beforehand.
Keep the bathroom door open and switch on the exhaust fan. Ample air circulation will nullify the risk.
Apart from that, wear gloves and put on a respiratory mask. A pair of safety goggles would also come in handy since bleach can cause severe damage if it gets to the eye.
Step 2. Dilute The Bleach
Since bleach is highly proactive, we must dilute it before using it for household cleaning applications. Prepare a solution with 1/3 proportions of bleach in it.
However, if the mold has spread too far, you might use a stronger solution. We are talking half water-half bleach.
That said, make sure it will not discolor your tiles before going for a higher bleach concentration.
Step 3. Rinse The Tiles With Water
It is a good idea to wet the tiles before throwing bleach mix on them.
Even though we will be using a toned-down version of bleach, it might lead to irreversible damage. Dowsing the tiles restrict the chemical absorption ability of the tiles.
That means wet tiles will take in less bleach compared to dry ones. Yes, it will also compromise the effectiveness of the bleach. But, you will have to do it regardless to protect the tiles.
Step 4. Use The Bleach Mix
Spray the bleach mix on the grouts and scrub them with an old toothbrush or a power scrubber. Mold loses its visibility fast when it comes in contact with bleach. So, continue scrubbing even after the mold stains disappear. Scrub for 10 minutes minimum.
Step 5. Clean The Bleach
Wait for 5/10 minutes for the bleach to dry out. Then pour water over the grout lines and wipe them with a washcloth. Since bleach is a powerful mold cleaner, it is not necessary to follow up with an anti-mold spray. But, you can do it nevertheless for extra protection.
How To Prevent Mold From Growing In Bathroom Grout?
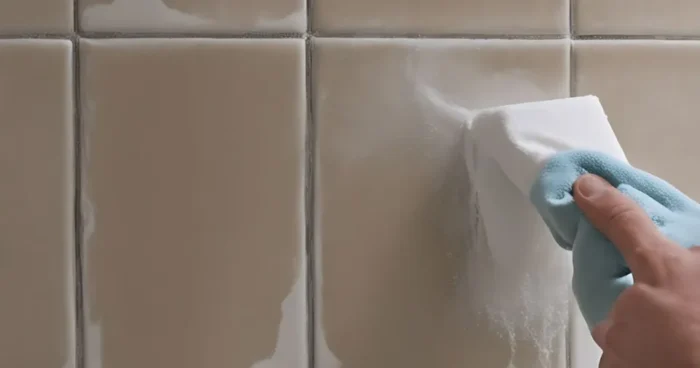
1. Keep The Bathroom Door & Shower Curtain Open After Shower
Dampness is the number one reason for mold infestation. So, maximize your bathroom ventilation to avoid mold growth. Keep the shower curtain and the bathroom door open for 10/15 minutes after taking a shower.
2. Use Bathroom Exhaust Fan and Dehumidifier
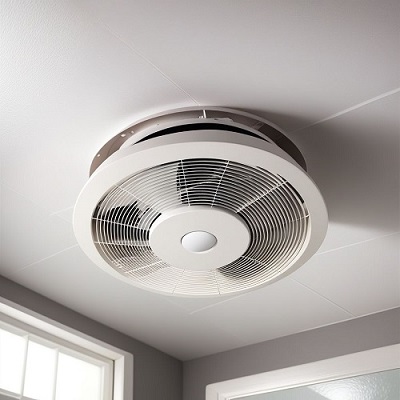
Use a high-performance exhaust fan like the Broan-NuTone 671 Ventilation Fan in your bathroom.
It can draw out 70 cubic feet of damp air per minute, and the best thing is, you will not even notice that it is running at full throttle, thanks to its super-quiet fan rotation mechanism.
Keep the fan on for at least a quarter of an hour after every shower.
You can also consider buying a dehumidifier for the bathroom. If you purchase the TCL 50 Pint Smart dehumidifier, you can move it in and out of the bathroom whenever you want.
Drag it in after taking a shower, and let it work its magic for a while to absorb the extra humidity.
3. Clean The Tiles Regularly
Ideally, you should clean the shower tiles after every bath, but truth to be told, that is too much of a hassle indeed. So, schedule weekly cleaning for the tiles.
Simply rinse it with soap water, spray a bit of anti-mold formula, and allow it to dry. Turning on the exhaust fan will help with the drying.
4. Do Not Leave Extra Wet Towels In The Bathroom
Do not keep multiple wet towels together in the bathroom. Change the towel once a week. Keep the exhaust fan on when drying towels in the bathroom. Dehumidifiers would also be useful.
5. Repair Leaky Faucets And Showerheads
If your shower head and faucets leak, your bathroom will never stay dry. Sooner or later, this will lead to mold inside the bathroom. So, make sure your bathroom plumbing is absolutely leak-free to avoid mold infestation.
6. Use Grout Sealant
Lay a single or double layer of grout sealant to seal the grout lines. We recommend using the Homax Series 9324 22 oz. Silicone Grout Sealer. The sealant will serve as a moisture barrier and keep the grouts dry for prolonged periods. As a result, they will be less susceptible to mold infestation.
Frequently Asked Questions
Can I Use Vinegar To Clean Grout Lines?
Unless the mold has grown too much, you should be able to clean grout lines using vinegar. Spray vinegar on the grout lines and wait for half an hour. Once the vinegar desiccates, apply an anti-fungal spray to rule out sudden mold reoccurrence.
Can a steam cleaner be used to clean bathroom grout mold?
Yes, a steam cleaner can effectively kill mold spores and loosen mold from grout due to its high-temperature steam.
What are some techniques for preventing mold in bathroom grout?
Mold prevention techniques include proper ventilation, regular cleaning, and using mold-resistant grout or sealant.
Are there any eco-friendly alternatives for cleaning bathroom grout mold?
Yes, eco-friendly alternatives like hydrogen peroxide and vinegar can be used for mold removal, reducing the environmental impact of cleaning.
What kills mold in bathroom grout?
Mold in bathroom grout can be effectively killed using various methods and products.
Is vinegar or bleach better for killing mold?
Both vinegar and bleach can be used to kill mold in bathroom grout.
Which is better depends on personal preference and safety considerations?
Vinegar is a milder and eco-friendly option, while bleach is a stronger disinfectant but should be used with caution and proper ventilation.
Final Say
Mold in the grout makes the bathroom tiles appear old and dirty, not to mention the potential health risks. So, you should know how to clean bathroom grout mold for ensuring a truly mold-free bathroom.






![How To Clean Dark Grout That Has Turned White [5 Easy Ways]](https://homepander.com/wp-content/uploads/2021/12/How-To-Clean-Dark-Grout-That-Has-Turned-White.webp)

![How to Remove Crystallized Urine [Explained]](https://homepander.com/wp-content/uploads/2022/02/How-To-Remove-Crystallized-Urine.jpg)
