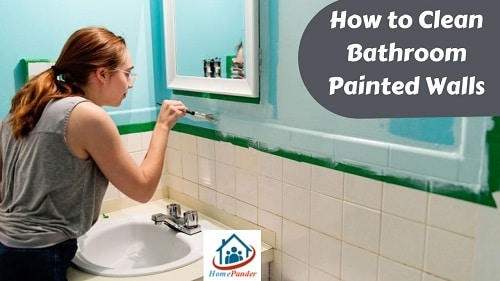
Dirt and moisture can build up on the painted walls of your bathroom and make them look quite washed out. A nice, thorough clean will not only brighten up your bathroom walls but also keep them safe from risks of mold and mildew. For that, you’ll need to know the correct way to clean bathroom painted walls.
You can clean bathroom painted walls with some DIY formulas that you can easily whip up in your home. Store-bought cleaner options are also abundant.
How should you prep your wall before the cleaning? What materials should you use? How can you ensure the paint will not be compromised? Stay with us for the next five minutes, and you will find out without breaking a sweat.
Things You Need
- Dish soap
- Degreaser/ baking soda
- Bucket
- Sponge
- Long handle microfiber mop
- Rag
- Gloves
How To Clean Bathroom Painted Walls?
Step 1. Prepare The Wall
Before you use the cleaner, you should try to take out as much of the dust and moisture you can. Otherwise, you will need more cleaner. Not to mention, the cleaning process would get unnecessarily lengthy.
You can simplify the process by wiping the walls first. Take a microfiber mop with a long handle. Roll it from top to bottom of the wall, so that it captures most of the surface dirt and moisture. Do not use a regular duster since the bathroom walls will have more moisture than other parts of your house.
Go through the wall two or three times. Then, you are ready to move on to the next stage.
Step 2. Prepare A Warm Water-Liquid Detergent Mix
Laws of chemistry suggest hot water is more effective for cleaning than cold water. When water molecules get heat exposure, they become more proactive and blend faster with other materials. For this reason, experts recommend using hot water during cleaning.
Heat a kettle of water on your stove and wait till it starts to boil. Once the boiling begins, take the kettle down and empty it into a bucket. Then, add a few drops of mild liquid soap into the water and wait a bit for the water to get a bit colder.
Put on a pair of gloves and stir the water well with your hands. The gloves will protect your skin from the high water temperature. The solution will be ready for use when it becomes bubbly.
Step 3. Apply The Cleaner
Now, it is time for action! Before you douse the wall with the soap-water mix, however, it would be a good idea to cut off the power connection to the bathroom. If water gets to the power outlet in the wall, it could cause a severe accident. As you work through the wall, try as much as you can to keep the water from spilling inside the power sockets.
You should turn off the bathroom power regardless of your alertness-better to be safe than sorry!
Dip the sponge in the mixture and scrub the wall with it. Instead of a scrubber, you can use the microfiber mop you had used earlier. It will make it easier to reach all angles. That said, it will not let you exert as much force on a particular spot on the wall as you can with a sponge. If you use a sponge, keep a footstool nearby so that you can cover the higher portion of the wall.
As you scrub, notice whether or not the wall appears brighter than before. Put some extra pressure on visible spots, but do not be too harsh because it can damage the paint.
If a stain refuses to come off, you can apply some dry baking soda to it. Let it sit for a couple of minutes, and then scrub it. This method works well in most cases. Alternatively, you can use a degreaser. Bathroom walls tend to have a glossier finish to repel moisture accumulation. So, a degreaser would work like magic to vanish stubborn marks on your beautiful walls.
Step 4. Wash Off & Dry
After scrubbing the whole wall, allow it to air dry for half an hour or so. Then, spray water on the entire wall to wash off the cleaner. A small water hose or a hand shower would be perfect for this. You can also choose to douse sections of the wall with a mug as you scrub. It would take you a bit longer, but it will produce the best results.
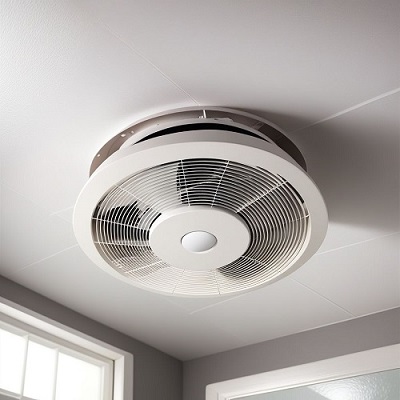
After rinsing the wall, wipe it with a dry rag. Or, you can use a microfiber mop and run it across the walls again to make them dry. Once you are done, turn on the bathroom exhaust fan. It is important to let the wall dry thoroughly to eliminate the threat of mold and other harmful microbes contaminating it.
How To Clean Bathroom Painted Walls When Mold Grows Over Them
Step 1. Apply Solution
You can spring right into action when you are trying to remove mold from a painted bathroom wall. No need to dust the wall first, get right into it. Since the wall has already caught mold, chances are you would need a fresh coat of paint anyway.
Applying bleach solution is the common modus operandi when it comes to fighting mold. That said, we have our reservations about the use of bleach. It is overly aggressive and dangerous to handle. A minor lapse in concentration could lead to a severe injury while using bleach. Also, it can cause toxic fumes, which can damage your respiratory system.
Alternatives are baking soda paste and commercial anti-mold sprays. But, the truth is, bleach offers a cheap but highly functional solution to the mold problem. So, we will give you a rundown on how to clean bathroom painted walls with bleach.
Bleach is a powerful reactant, so we need to sap its strength considerably before using it. Make a diluted bleach solution with three parts of water and one part of bleach. Do not add anything else to the mixture.
Take the solution in a sprayer bottle and spray the mixture all across the mold-covered region. Do not forget to wear a mask and gloves before doing this.
Step 2. Scrub The Area
Take a scrub brush. You would need to put some extra effort to get the mold off, compared to other stains. So, the brush does not have to be non-abrasive. Since the area is already discolored, you will need a fresh coat of paint.
Move your hands clockwise and anti-clockwise as you scrub the mold. If the mold is difficult to wipe off, pour some more bleach solution over it. Eventually, it will give in.
Step 3. Use Vinegar
The bleach will get the mold out of your sight, but that does not mean it has gone away for good. The wall could still have mold inside, and if you do not kill them off, mold will resurface within a few months. No worries, something as simple as white vinegar can inflict a lethal blow.
Take a bottle full of vinegar and spray it all over the wall. Do not leave out an inch because you do not know where the spores could be. After dousing the wall with vinegar, leave it for an hour and two. When you come back to rinse the wall, there should be no living traces of mold in it.
Do I Need To Repaint My Wall After Cleaning?
Unless your walls get discolored because of mold, there is no need to repaint after cleaning the wall. Painting is a lot of work, and it does not come cheap as well. So, try to protect your existing coat of paint as much as you can. Wikihow has advised its readers to remember two things when cleaning a painted wall.
Rule number one, do not use ammonia on your walls. Ammonia is a nitrogen-hydrogen compound that does not go well with commercial paint. Before buying a cleaner, check to make sure there is no ammonia in it. Ammonia can burn the color of the pale and make it look awfully pale.
Rule number two, choose scrubbers with soft bristles or soft sponges. Rough scrubbers can damage the color coat. Therefore, see to it that the scrubber you are using to clean the wall is non-abrasive.
Frequently Asked Questions
I Made Streaks While Cleaning The Walls? How Can I Make Them Go Away?
Leaving repugnant streaks on the wall after cleaning painted walls happens more often than you would think! Thankfully, there is an easy fix to this. Take a wet washcloth and try to rub the streaks away. If that does not work, use stain remover spray.
Final Say
Learning how to clean bathroom painted walls is essential in preserving the glamor of your painted bathroom walls. As you can see, you can take care of it with ease without consulting any professional help. Remember to use the right tools and materials to keep the paint unharmed.





![How To Clean Dark Grout That Has Turned White [5 Easy Ways]](https://homepander.com/wp-content/uploads/2021/12/How-To-Clean-Dark-Grout-That-Has-Turned-White.webp)

![How to Remove Crystallized Urine [Explained]](https://homepander.com/wp-content/uploads/2022/02/How-To-Remove-Crystallized-Urine.jpg)
