The hardest thing to do is clean off the excess oil-based paint from the bottom of your sprayer. And if you leave them overnight the paint will dry off. So, you have to do it immediately.
That will result in your sprayer clogging up. You’ll have a perfect sprayer to work with if you only clean it off properly.
So, the question is how to clean oil based paint from sprayer without the help of a professional?
Start off by removing all the parts from the sprayer. Then, soak it in a bowl of paint thinner. But make sure to use a toothbrush for those tough spots. Finally, dry it off and you’ll be set.
No need to worry if you’re still confused. Let us walk you through the entire process to help you understand it better.
The essentials: What you need
Now hold on there. Before we start taking you on a tour of the entire process let’s go through all the things you’ll need.
- Gloves– The gloves will work out their magic and keep your soft hands safe from any harm of the chemicals.
Here is the one that we recommend- Wostar Nitrile Disposable Gloves ( best gloves for oil painting )
- Wrench– The wrench will help you remove all the itsy bitsy parts of the sprayer.
- Paint thinner– The paint thinner will carry out the main task of removing the oil-based paint.
- Brush– This handy item will help get you the paint to all parts of the sprayer.
- Toothbrush– To reach out to the parts where a brush can’t enter, use a toothbrush.
- Rag– The rag will be used in the last step to wipe off the excess paint thinner.
- Quick Pick: MR.SIGA Microfiber Cleaning Cloth ( best microfiber cleaning cloths )
How to Clean Oil Based Paint From Sprayer?
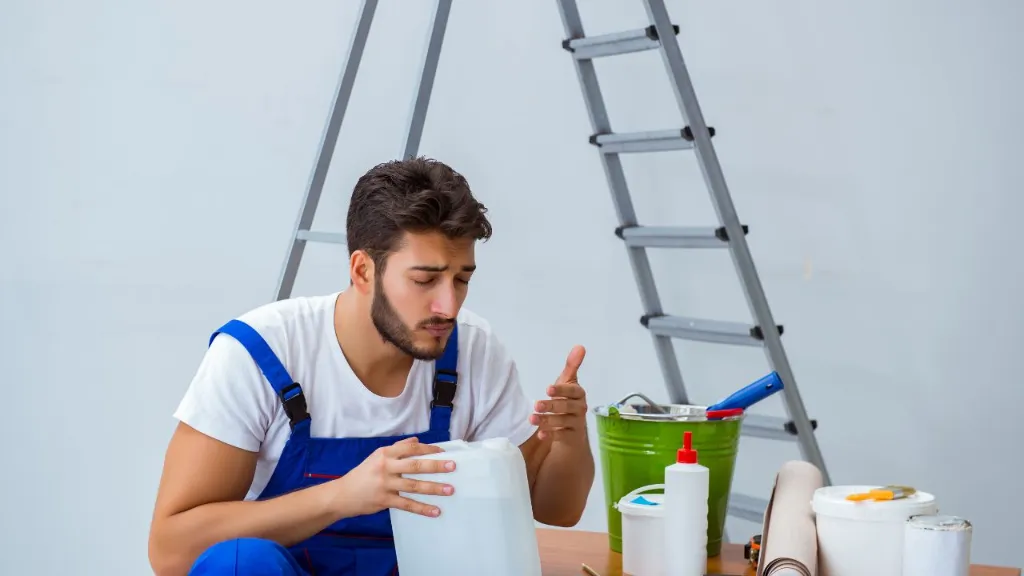
The best part about this process is that there are only 4 steps and they’re all super easy. Additionally, they don’t require a lot of time.
So why don’t we take a look at the steps?
Step 1- Remove all the parts of the paint sprayer.
The first thing you have to do is remove all the parts of the sprayer. By that, we mean all the removable parts.
This way the paint thinner will be able to slip through all the hooks and nooks. Moreover, they make your sprayer squeaky clean.
So, start by taking off the tank of the sprayer. Then remove all the nozzles and tubes of the sprayer.
Once that’s done you can head over to the next step.
Here are some of our recommendations for the Best Paint Sprayer for Oil Based Paint –
Best Airless Paint Sprayer: Graco Magnum 262805 X7 Cart Airless Paint Sprayer.
Best Versatile Airless Paint Sprayer: Graco Magnum 262800 Stand Airless Paint Sprayer.
Best HVLP Spray Gun: Neu Master 600 Watt High Power HVLP Home Electric Paint Spray Gun
Step 2- Soak the tank in paint thinner.
Secondly, you need to soak the tank of the sprayer in the paint thinner. So, take out your bottle of paint thinner and pour it into a large bowl.
But before all that you need to wear gloves. Otherwise, the paint thinner will slowly react with your skin and cause skin irritation.
You know what they say. It’s better to be safe than sorry.
Afterward, dip the tank into the bowl. At the same time grab a paintbrush to scrape off the sticky paint from the tank’s surface.
Once you’re done scraping remove the tank from the bowl of paint thinner. Yes, 10 to15 minutes of dipping is all it needs to be cleaned and ready to be used again.
Step 3- Apply the paint thinner in the inner parts.
After cleaning the tank you need to move on to the harder parts. That’s the inner corners of the paint sprayer.
If you have worked with the sprayers before then you know how difficult it is to reach those pesky corners. But fear not, all you need is a toothbrush soaked in paint thinner.
With a few strong rubs of the bristles, the paint will come running off. Don’t believe us? Then give it a try yourself. You’ll see some magic right before your eyes.
Step 4- Dry off the sprayer.
Lastly, dry off the sprayer. And to do this you need a rag.
The trick is to dampen the rag at first and then clean off the sprayer. This way all the excess paint thinner will be out of your way.
Afterwards, you have to use a dry rag to wipe off all the liquid. And you’ll have one clean and dry sprayer in your hands again.
FAQ
Question: Can you leave oil-based paint in a sprayer overnight?
Answer: Yes, you can leave it overnight but make sure you don’t leave it pressurized. This can prove to be quite hazardous. Instead, leave it in a bucket of water to use it again in the morning.
Question: What cleaner should I use to clean my sprayer?
Answer: The best cleaner for your sprayer depends on the type of paint that you used. You see, if you use a latex-based paint then water is enough to clean the sprayer. Whereas oil-based paints need the paint thinner and lacquer-based paints need lacquer thinner.
Question: How often do I clean my sprayer?
Answer: The sprayers need constant maintenance so you have to clean them after every use. At the same time, you have to make sure that the entire thing is cleaned properly. Or else the leftover paint will dry up and clog your sprayer.
Question: Can you run water through a sprayer?
Answer: Absolutely! There is no problem if you run water through a sprayer. It’ll clean your sprayer to some extent. But make sure that you get it completely out. Otherwise, it’ll corrode the metal parts of the sprayer.
Here is a nice video on how to clean oil based paint out of sprayer.
Final words
Well, there you have it. Now you know how to clean oil based paint from a sprayer.
Hold on. Before you start carrying out the process yourself let us give you one final piece of advice.
If you have too much trouble getting rid of the paint from the metal parts then use a brush with metal bristles. The hard surface will scrape off the paint in no time.
Alright, that’s all from our side. Have a good day with how to remove oil based paint from hands.





![How To Clean Dark Grout That Has Turned White [5 Easy Ways]](https://homepander.com/wp-content/uploads/2021/12/How-To-Clean-Dark-Grout-That-Has-Turned-White.webp)

![How to Remove Crystallized Urine [Explained]](https://homepander.com/wp-content/uploads/2022/02/How-To-Remove-Crystallized-Urine.jpg)
