If you want to clean your Moen faucet, or maybe replace it, removing it on your own might be the better option. Removing your Moen bathroom faucet is very easy and simple.
To remove the Moen bathroom faucet handle, start by using a strap wrench counter-clockwise on the bottom of the faucet handle to unfasten the faucet handle. Then remove the faucet spout using a hex key. Disassemble the faucet system using the hex key and take out the C-clips.
There are many different types of Moen faucet handles. Each is built differently. While some faucet handles are fixed with screws, some aren’t. The removal process in both these cases is different.
Some of the older models were not built to be removed separately, so when you want to take the faucet handle off, you will have to take apart the entire faucet system.
In today’s article, we will be talking about how to remove Moen bathroom faucet handle and all the things you need to know.
How To Remove Moen Bathroom Faucet Handle?
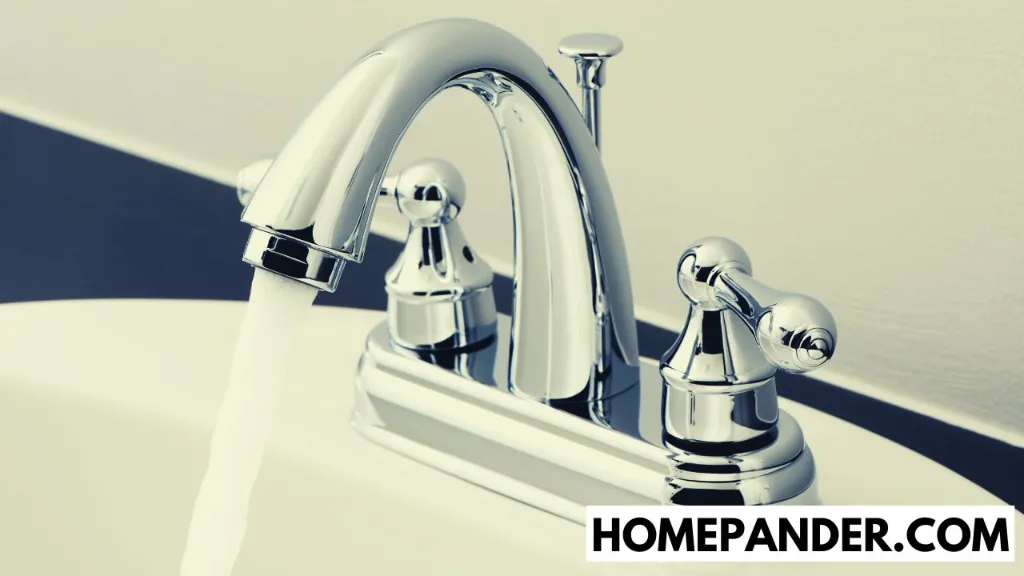
Removing a Moen bathtub faucet handle is not the easiest task ever. However, if you follow the steps below properly, you will be able to get the job done in minutes. Here is how you remove a Moen faucet handle:
Step 1: Unfasten The Faucet Handle
To unfasten the faucet handle, grab a wrench, and grab the bottom of the faucet handle using that. Twist counter-clockwise. Use pliers to remove the faucet handle trim. You can use faucet handle pullers as well.
Step 2: Remove The Faucet Spout
Twist the stopper red counter-clockwise, usually sitting beneath the sink, to unfasten it. Once the rod is unfastened, slowly pull it out from the top. Once that’s done, take a 5.5 mm hex key, and insert it right at the hole where the stopper rod was.
Make sure it is tight. Slowly turn the key counter-clockwise to unfasten the set screw and remove the spout.
Step 3: Disassemble The Faucet
This is where you have to be very careful. After the spout removal, move on to the next setscrew and unfasten that using the hex key again. With all the key screws unfastened and loose, the faucet cartridge will be very shaky and wobbly.
Step 4: Take Out C-clips
This is the last step of faucet removal. Once you have unfastened all the screws and look at the handles and locate the c-clip. Slowly take these out. Use a flat-headed screwdriver to pull it out.
How To Remove Moen Bathroom Faucet Handle Without Screws?
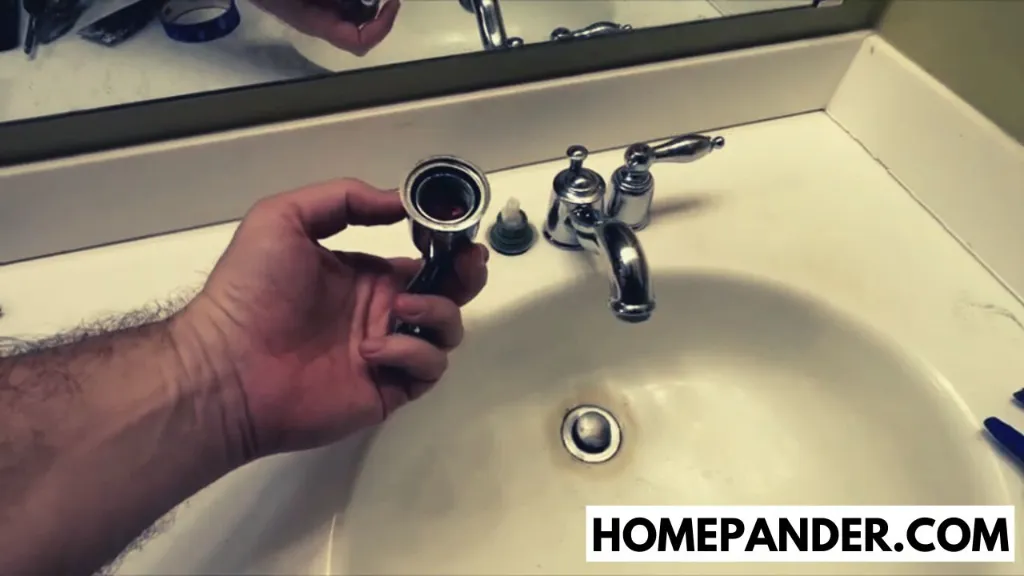
The removal process of the Moen bathroom faucet handle without screws is comparatively easier than the one with screws.
Here’s how you remove screwless bathroom faucet handles:
Step 1: Locate The Caps Or Buttons
Faucet handles that don’t have screws are usually fixed with caps. The first step is to find and locate the caps. Look around the sides and you will see caps if it has any.
Step 2: Take The Cap Out
Use a flat-headed screwdriver to take the cap out. Be very delicate while inserting the screwdriver as these caps can be very fragile.
Step 3: Pull Out The Screw
Once you have popped off the cap, there should be a screw underneath. Use a screwdriver to remove it.
Step 4: Proceed With Faucet Handle Removal
Once the screw is removed, your faucet handle is free. Pulling the handle with bare hands should remove it, but if it doesn’t, use pliers. If it still does not come out, use a faucet handle puller.
How To Replace Moen Bathroom Faucet Handle?

Once you are done removing the faucet handle, it is time to replace it with a new one. Installing a new bathroom faucet is pretty easy if you have removed the previous one by yourself. Because the installation process is exactly the removal process backward. Be sure to maintain the correct order.
Best Moen Single Handle Bathroom Faucet
According to kitchen faucet depot, Moen is the biggest and the most trustworthy brand when it comes to faucets. So, answering this question with just one of the products from Moen is impossible.
However, the Moen 7594EWSRS, a best seller from the brand with over 5,000 reviews on amazon seems to be the showstopper from this brand.
Before you choose one faucet it’s better to know all the options available for moen bathroom sink faucet handle replacement.
Troubleshooting Common Issues
1. Leaking Faucet
- Issue: If you notice water dripping from the faucet, you have a leaky faucet. This is a common problem in aging faucets.
- Troubleshooting Steps:
- Start by turning off the water supply to the faucet.
- Disassemble the faucet as explained in the previous sections to access the cartridge.
- Check the cartridge for visible damage, such as cracks or worn-out rubber gaskets.
- If you find any damage, replace the cartridge with a new one from Moen.
- Reassemble the faucet carefully, ensuring all connections are tight but not overtightened.
- Turn on the water supply and check for any leaks. If the problem persists, it may be time to consult a professional plumber.
2. Wobbly Handle
- Issue: A wobbly handle can be frustrating and may indicate loose connections within the faucet.
- Troubleshooting Steps:
- During disassembly, inspect all the components and connections carefully.
- Tighten any loose nuts, bolts, or screws you come across. Pay special attention to the handle and cartridge connections.
- Reassemble the faucet, ensuring all parts are properly aligned.
- Turn on the water supply and test the handle’s stability. If it’s still wobbly, you may need to replace damaged parts or consult a professional.
3. Difficulty Removing Handle
- Issue: If the faucet handle is stuck and won’t come off after removing the screw, it might be due to corrosion or mineral deposits.
- Troubleshooting Steps:
- Apply a penetrating oil like WD-40 around the base of the handle where it meets the faucet body.
- Allow the oil to penetrate for at least 15-30 minutes to loosen any corrosion.
- Gently tap the handle with a rubber mallet or a wooden block to help it break free from the faucet body.
- Once the handle starts to move, continue wiggling it until it comes off.
- Clean the exposed area thoroughly to remove any residue before reassembling the faucet.
These troubleshooting steps should help you address common issues with your Moen bathroom faucet handle.
Cleaning and Maintenance
Regular cleaning and maintenance can extend the lifespan of your Moen bathroom faucet, keeping it in optimal condition. Here’s how to effectively clean and maintain your faucet:
1. Materials You’ll Need
- Mild, non-abrasive cleaning solution
- Soft cloth or sponge
- Old toothbrush (for hard-to-reach areas)
- Plumber’s tape (for resealing connections during maintenance)
2. Cleaning the Faucet
- Start by turning off the water supply to the faucet to prevent any accidental water flow during cleaning.
- Dampen a soft cloth or sponge with warm, soapy water or a mild cleaning solution. Avoid abrasive or harsh chemicals, as they can damage the finish.
- Gently wipe down the entire faucet, including the handle, spout, and base. Pay attention to any areas with mineral deposits or soap scum buildup.
- For hard-to-reach areas, use an old toothbrush to scrub away debris and buildup.
- Rinse the faucet thoroughly with clean water to remove any cleaning residue.
- Dry the faucet with a clean, dry cloth to prevent water spots and maintain its shine.
3. Maintaining the Connections
- Periodically check for any loose connections, including nuts, bolts, and screws. Tighten them as needed to prevent leaks or wobbling.
- If you disassembled the faucet for maintenance or repairs, use plumber’s tape to reseal threaded connections. This helps create a watertight seal and prevents leaks.
4. Preventing Mineral Buildup
- If your area has hard water, mineral deposits can accumulate on your faucet over time. To prevent this:
- Consider installing a water softener to reduce mineral content in your water supply.
- Use a vinegar solution (1 part vinegar to 1 part water) to remove mineral deposits. Soak a cloth in the solution and wrap it around the affected areas for about 15-30 minutes, then rinse and dry.
5. Avoiding Harsh Cleaners
- Never use abrasive cleaners, scouring pads, or harsh chemicals on your faucet. These can scratch or damage the finish.
- Stick to mild, non-abrasive cleaning solutions and soft materials to clean your faucet gently.
6. Regular Inspection
- Periodically inspect your faucet for any signs of wear, damage, or corrosion. Address any issues promptly to prevent further damage.
By following these cleaning and maintenance guidelines, you can keep your Moen bathroom faucet looking great and functioning flawlessly for years to come. Regular care and attention will ensure that your faucet remains a reliable fixture in your bathroom.
Reassembling the Faucet
After successfully troubleshooting and performing any necessary repairs or maintenance on your Moen bathroom faucet, it’s time to reassemble the faucet components. Proper reassembly is crucial to ensure that the faucet operates correctly and without leaks. Follow these steps carefully:
1. Gather Your Tools
Before starting the reassembly process, make sure you have the following tools and materials ready:
- Screwdriver
- Adjustable wrench
- Plumber’s tape (for resealing threaded connections)
2. Inspect and Clean Components
Check all the faucet components, including the cartridge, handle, and any other parts you may have removed, for cleanliness and damage. Clean any residue or mineral deposits from these components using a soft cloth or mild cleaning solution if necessary.
3. Insert the Cartridge
- Begin by inserting the cartridge back into the faucet body. Make sure it fits snugly and aligns correctly with any grooves or notches in the faucet body.
- Tighten the cartridge using an adjustable wrench. Be careful not to overtighten, as this could damage the cartridge or faucet.
4. Position the Handle
- Slide the faucet handle onto the cartridge stem, ensuring that it aligns correctly with any splines or keyways on the cartridge.
- Press the handle down firmly but gently. It should sit flush against the faucet body.
5. Secure the Handle
- Reinsert the handle screw that you removed earlier. Use a screwdriver to tighten it clockwise until it’s snug.
- Replace the decorative cap over the handle screw hole. Gently press it into place until it snaps securely.
6. Reconnect Water Supply
Ensure that the shut-off valves under the sink are still in the “off” position. Once the faucet is reassembled, you can turn the water supply back on.
7. Check for Leaks
- Turn on the faucet to the “on” position and let the water run for a few moments. Check all connections, including the base of the handle and the cartridge, for any signs of leaks.
- If you notice any leaks, tighten the connections slightly and recheck. Repeat this process until there are no leaks.
8. Test Functionality
Test the faucet’s functionality by running both hot and cold water. Ensure that the water flows smoothly, and the handle operates as expected. Check for any unusual noises or vibrations.
9. Final Inspection
Perform a final visual inspection of the faucet to ensure that all components are correctly installed, and there are no loose parts or gaps.
By following these steps, you can successfully reassemble your Moen bathroom faucet after repairs or maintenance. Remember to exercise caution during the reassembly process to avoid overtightening, which can lead to damage. Proper reassembly ensures the continued reliable operation of your faucet.
Related Questions
[faq-schema id=”3659″]
Conclusion
Removing a bathroom faucet handle is a pretty easy task. Although I have mentioned it in the beginning, some of the older models from Moen are not exactly the ideal faucets to take apart by yourself. These need to be disassembled entirely just to remove the faucet handles.
You can end up hurting yourself, ruining the faucet forever, and also ruin your sink along with it. This is why you should be very careful when you are doing it on your own. Professional help is always recommended on how to fix moen bathroom faucet handle.
Good luck with figuring out how to remove the Moen Brantford faucet handle.






![How To Clean Dark Grout That Has Turned White [5 Easy Ways]](https://homepander.com/wp-content/uploads/2021/12/How-To-Clean-Dark-Grout-That-Has-Turned-White.webp)

![How to Remove Crystallized Urine [Explained]](https://homepander.com/wp-content/uploads/2022/02/How-To-Remove-Crystallized-Urine.jpg)
