The toilet, unassuming but integral to our daily lives, often functions seamlessly without much thought spared to its operation. However, when noticeable issues such as water spraying from the tank manifest, it becomes crucial to understand the root of the problem.
This understanding is born from getting to grips with the basic mechanics of your toilet, including each part’s role in the system.
From the flapper to the fill valve, the overflow tube, and their interconnected workings, the efficiency of your toilet is profoundly influenced.
Once you’re equipped with these foundational insights, the task of identifying the precise problem causing your toilet tank to spray water becomes manageable and less daunting.
Understanding Your Toilet’s Mechanics
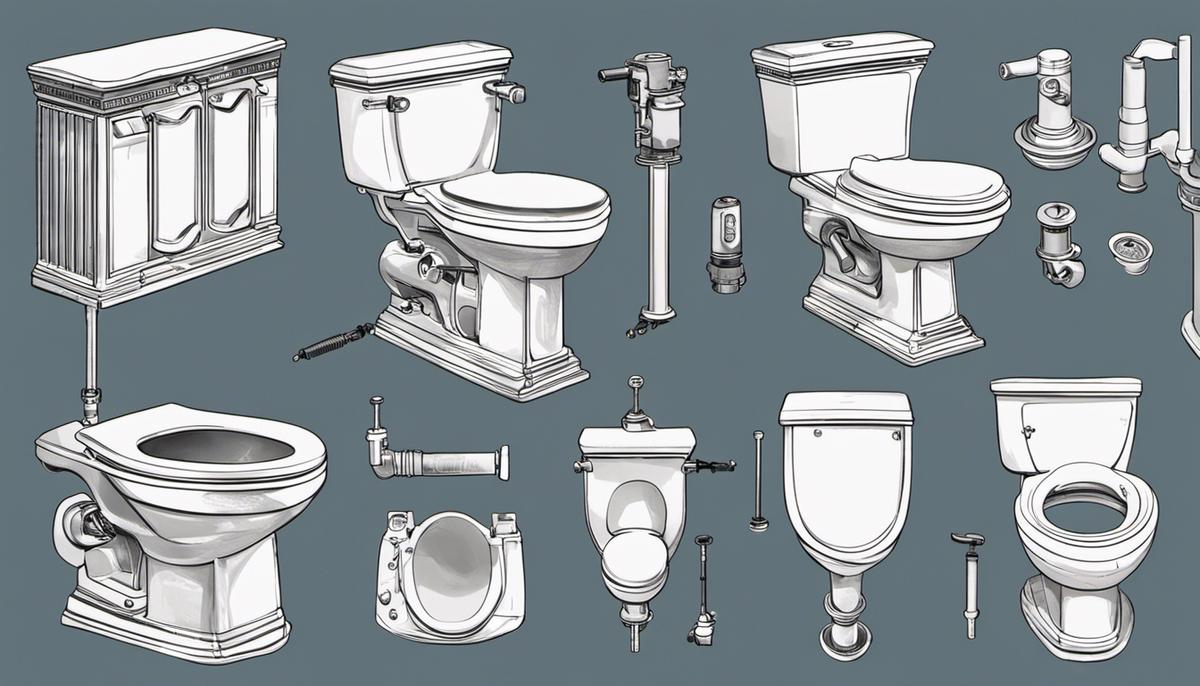
Toilet Tank Parts
Toilet tanks are comprised of several key components that work together to flush and refill the tank with water.
The first part to understand is the flapper. This is a rubber piece that covers the opening at the bottom of the tank. When you flush the toilet, the flapper lifts to let water flow out of the tank and into the toilet bowl. After flushing, the flapper falls back into place to cover the opening, allowing the tank to refill with water.
The fill valve, also known as the ballcock, controls the water level in the toilet tank. The fill valve is connected to the water supply line and is responsible for refilling the tank after each flush.
This valve is usually adjustable, letting you control the level of water in the tank. Once the tank is filled, the fill valve shuts off the water supply.
The overflow tube is a safety feature of the toilet that prevents water from overflowing the tank. This tube sits near the center of the toilet tank. If the fill valve fails to shut off the water, the overflow tube redirects excess water into the toilet bowl to prevent flooding.
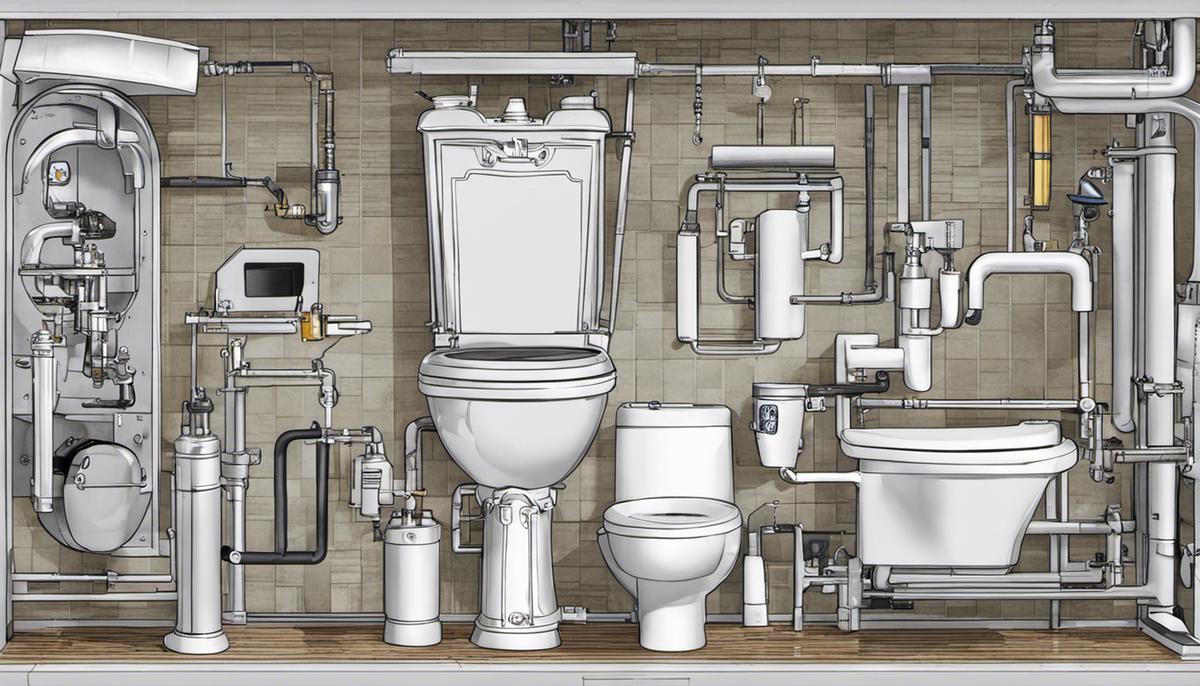
The Interaction of Toilet Tank Components
When you press the flush lever, it lifts the chain connected to the flapper. As the flapper lifts, it lets water out from the tank into the toilet bowl through a siphoning process. This is what causes the flush.
As the water level in the tank lowers, so does the flapper, until it covers the opening again. Meanwhile, the drop in water level also lowers the float attached to the fill valve.
This signals the fill valve to allow water from the supply line to refill the toilet tank.
The water continues to fill until it raises the float to the level that shuts off the fill valve. If for some reason the fill valve does not shut off, and the water level exceeds the top of the overflow tube, the excess water will be directed into the toilet bowl via the overflow tube, preventing an overflow and potential flooding.
Understanding these components and their interplay is crucial for diagnosing and fixing issues when your toilet tank is spraying water.
Identifying the Problem For Toilet Tank Water
Identify the Problem
Begin by taking the time to identify the exact problem that causes your toilet tank to spray water.
This process may take a significant amount of time as certain issues may only present themselves intermittently.
Be prepared to spend anywhere between a few minutes to an hour or more, depending on the complexity of the problem.
Surveying the Tank
Once the water tank of your toilet is open, it’s crucial to pay close attention to every part of it. While observing, note whether anything appears to be broken or out of place.
During this time, make sure the water valve is turned off to prevent any incidents while you’re surveying.
Observing the Flush Process
Next, using a bucket or another method to manually fill the tank, watch what happens during a flush.
This can help you understand if a particular part of the process is causing the spray issue. For example, if the water sprays when the flapper raises, it could be a sign that the flapper isn’t sealing properly.
Leak Detection
During your survey, also keep an eye out for any visible leaks. Leaks not only contribute to the spraying issue but could also lead to further damage if left untreated.
If you notice any leaks, identify the source. This could be from cracks in the tank, an issue with the fill valve, or problems with the seal at the base of the tank.
Check Toilet Parts for Damage
Lastly, review the main toilet parts such as the flapper, fill valve, overflow tube, and toilet handle for any defects or damages. Damaged parts could hinder the normal functioning of the toilet, causing it to spray water. If any parts are found to be damaged, replace them as soon as possible.
These steps should help you identify the cause of your toilet tank spraying water. Once the issue has been identified, you can then take the appropriate steps to fix it.

Repairing or Replacing Parts
Identify the Issue
The first step toward troubleshooting your toilet tank issue is to understand where the water is spraying out from.
There are three main parts that could cause such an issue – these are the flapper, fill valve, or the overflow tube. If your toilet is constantly running or you observe water leaking, it could point to a problem with one or more of these components.
The flapper creates a seal within the tank, the fill valve controls the water level and the overflow tube prevents the tank from overflowing.
Fix or Replace the Flapper
For issues related to the flapper, turn off the water supply to the toilet before beginning your work. Flush the toilet to drain the water from the tank, then inspect the flapper for any signs of wear or damage. If the rubber is worn or warped, you’ll need to replace it.
To do so, simply unhook it from the overflow tube and attach a new one in its place. If the flapper appears to be in good condition, ensure that it’s not getting hung up on anything, preventing it from completely covering the valve.
Adjust the Fill Valve
If your issue lies with the fill valve, begin by turning off the water supply. Flush your toilet to drain the tank’s water. Unscrew the float arm from the fill valve and replace it with a new one. Make the necessary adjustments to the fill valve by turning the adjustment screw on top until the fill valve shuts off at the correct water level. Do this while the water is on to accurately adjust the water level.
Repair a Leaky Overflow Tube
To fix a leaky overflow tube, begin by inspecting it for any visible signs of damage. If there is, you’ll need to replace it, which will require removing and replacing the entire flush valve assembly.
If there’s no damage to the tube, the issue may be due to a too high water level, causing water to pour into the overflow tube. If this is the case, adjust the water level in your tank by adjusting the float on the fill valve.
Test Your Repairs
After repairing or replacing the necessary parts, turn the water supply back on and allow the toilet tank to fill up. Watch for any leaks or continuous water flow that could indicate your repair didn’t work.
After the tank has filled, flush the toilet to make sure everything is working as it should be. Make sure there is no more water spraying from the tank.
Remember, dealing with toilet tank issues may seem complicated, but most repairs are straightforward and do not require a professional plumber. It is, however, crucial to make sure that you follow all safety precautions and directions when carrying out repairs.

Preventive Maintenance
Understanding the Problem
There might be several reasons why a toilet tank might spray water. One could be a broken fill valve, which is responsible for controlling the amount of water in the tank. Another common issue could be a leaky supply line, the pipe that brings water to your toilet tank from your home’s plumbing system. Finally, a damaged flapper can also cause the toilet tank to spray water.
Preventive Measures
One of the most crucial steps in preventing future toilet mishaps is regular inspection of your toilet parts. This involves checking the fill valve, supply line, and flapper for any signs of damage or wear and tear. If any of these parts are worn out or broken, consider replacing them immediately to prevent future problems.
Daily Checks
Conduct daily checks to ensure your toilet is functioning properly. This comprises listening to your toilet after flushing. If it keeps making noise or fails to refill, these could be signs of a defect that needs immediate attention.
Understanding Water Levels
Keep an eye on the water level in your toilet tank. If the water level is too high, it might cause the tank to spray water. Adjust the fill valve or float arm to a lower level to correct this problem.
Water Supply Line Inspection
Inspect your toilet’s supply line regularly. Check for any signs of rust, corrosion or apparent physical damage. If there’s continuous water dripping from the supply line, it could be a leak that needs to be repaired immediately to prevent water wastage and toilet malfunctions.
Flapper Maintenance
Check the flapper and make sure it’s in good condition. The flapper should form a watertight seal and should open and close properly when you flush. If the flapper is damaged or warped, it won’t seal correctly, and it could cause the tank to spray water.
Ventilation
Ensuring adequate ventilation can help prevent mold growth, foul odors, and build-up of condensation, which can all contribute to damage and leaks over time.
Implementing these proactive measures and checking regularly can and will prevent future toilet mishaps, saving you from the hassle of unnecessary repairs, not to mention the potential savings on your water bill by avoiding excessive water usage.

While being adept at identifying and fixing problems when they arise is essential, the key to reducing the frequency of these incidents lies in preventive measures.
The adage, “prevention is better than cure,” holds true in maintaining your toilet system as well. Knowledge of daily precautionary steps and routine checks to preempt toilet issues can save you from unwanted disruptions.
After all, sustaining the smooth operation of your toilet tank relates directly to understanding its mechanics, promptly addressing any hitches, and consistently practicing preventive maintenance.
Therefore, the road to avoiding excessive water sprays from your toilet tank is paved with continual learning, regular inspection, and preventive care.


![How to Remove Crystallized Urine [Explained]](https://homepander.com/wp-content/uploads/2022/02/How-To-Remove-Crystallized-Urine.jpg)

![How To Clean Dark Grout That Has Turned White [5 Easy Ways]](https://homepander.com/wp-content/uploads/2021/12/How-To-Clean-Dark-Grout-That-Has-Turned-White.webp)