Plastic sinks in your kitchen and laundry room can be lifesavers. But over time, the constant wear and tear can cause the paint to peel away, leaving them looking dull and lifeless. However, by applying some fresh paint, your sink can look as good as new again.
Now the question is how to paint a plastic sink so that it’s squeaky clean.
First, you need to prepare the sink by cleaning and smoothing its surface. Then, you need to tape off all the waterways and allow it to dry completely before applying the acrylic paint. Once the paint has dried, you can remove the tape and start using your sink again.
However, we know that it’s hard to understand an entire process from a few lines. So, why don’t we take a look at this in more detail?
| Steps to Paint a Plastic Sink | Materials Needed |
|---|---|
| 1. Clean the sink thoroughly with soap and water, then rinse and dry it. | Soap, water, sponge, towel |
| 2. Sand the surface of the sink with a fine-grit sandpaper to create a rough texture for the paint to adhere to. | Fine-grit sandpaper |
| 3. Apply a plastic adhesion primer to the sink, following the instructions on the product label. | Plastic adhesion primer |
| 4. Allow the primer to dry completely before applying the paint. | Timer |
| 5. Apply a plastic spray paint to the sink, following the instructions on the product label. | Plastic spray paint |
| 6. Apply a second coat of paint if necessary, after the first coat has dried. | Timer |
| 7. Allow the paint to dry completely before using the sink. | Timer |
| 8. Consider using a clear coat sealer for added protection and durability. | Clear coat sealer |
One of our articles –How To Remove Latex Paint From Wall.
Grab these essentials :
The primary task for you is to gather up all the things you need. This way you won’t have to get up every once in a while.
So to make it easier for you here is a list of all the items you’ll need:
- Soap– You need these to help get rid of the stubborn grease on your sink.
- Rag– The rag is another item that’ll help get rid of the stains.
- Sandpaper- The sandpaper will smoothen out the surface for you. Our recommended model- 3M Aluminum Oxide Sandpaper.
- Painter’s tape– This handy item will help seal off all the waterways so that your sink doesn’t clog up.
- Acrylic paint– The paint will give your sink a new look.
- Paintbrush– To apply the paint you need a good old-fashioned paintbrush.
How to Paint a Plastic Sink [The 6-step approach]

Alright, now that you have an idea of what you’ll need let’s kick start our process. But before we do let us give you a piece of good news.
That is there are only 6 steps and they’re all straightforward.
So, even if you’re a beginner there is no need to sweat. That’s because we’ll guide you through all the processes one step at a time.
Step 1- Clean the sink thoroughly.
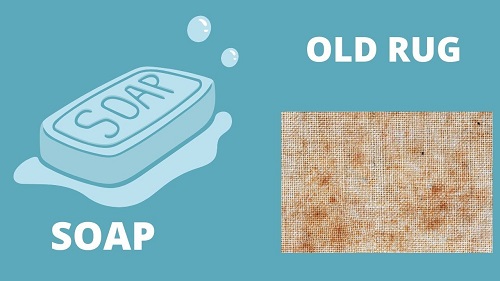
The first task that you need to conquer is cleaning the sink. To do this grab soap and an old rug and start rubbing off the grease from the sink.
Although this is a part of the painting process it’ll also reward you with a neat and clean sink. So, at the end of the day, it’s a win-win situation.
Hence, rub away those stubborn stains from your sink once and for all. And once you’re done head over to the next step.
Step 2- Smoothen the plastic sink.

Secondly, you have to use sandpaper to smoothen out the uneven surface on the sink. Otherwise, the paint will form lumps and bumps all over the place.
And that won’t look nice now, will it?
That’s why you have to use sandpaper and rub it across the surface of the sink till it’s as plain as butter.
You can read more here about the process of applying skim coating over wallpaper.
Step 3- Tape out the necessary part.

Once your sink surface is smooth again, take out the painter’s tape. Then seal off all the sinkholes and faucets so that paint cannot clog up the waterways.
Now if you don’t follow this step you’ll have to call a maintenance guy later on. So, to avoid the hassle do use a painter’s tape.
Step 4- Apply the acrylic paint.

For this step, you need a paintbrush and some good quality acrylic paint. Have that already? Then get ready to paint your sink.
Now while applying make sure you use small strokes. This will help get you an even texture. And ensure that your hand is not shaking while painting. Or else the paint will not turn out to be even.
Here are some of our recommendations for the best paint for plastic sinks
Krylon Fusion for Plastic: This spray paint is specifically designed for use on plastic surfaces, making it a great choice for painting a plastic sink.
Rust-Oleum Specialty Plastic Primer: This primer is formulated to help paint adhere to plastic surfaces, and can be used with any topcoat. It dries quickly and provides a smooth surface for painting.
Dupli-Color Vinyl and Fabric Coating: While this product is marketed for use on car interiors, it can also be used on plastic sinks. It provides excellent adhesion and flexibility, and is resistant to fading, cracking, and peeling.
PlastiKote 3101 Super Spray Paint: This spray paint is designed for use on plastics, and provides a tough, durable finish. It comes in a range of colors and finishes, including gloss, satin, and matte.
Step 5- Wait for the coat to dry.

Once you’re done applying the paint, you need to wait for the paint to dry off. This can take from 30 minutes to an hour.
Now while you wait for the air to do its magic make sure that you don’t touch it. Otherwise, you’ll find your hand covered in a big pile of paint.
Step 6- Apply a second layer of paint.

After the paint has completely dried off get ready with your paintbrush and paint. That’s because you have to apply another layer of coating.
The additional layer of paint will help create a stronger surface. Moreover, it’ll allow less damage to the surface and you’ll have to repaint the sink after a long time.
Common Mistakes to Avoid
here are some common mistakes to avoid when painting a plastic sink:
- Rushing the preparation process: Skipping or rushing the cleaning and sanding steps can result in poor adhesion and an uneven finish. Take your time to prepare the sink properly before painting.
- Not using the right paint and primer: Using regular paint or primer on a plastic sink can cause the finish to peel or crack over time. Make sure to use a plastic-specific primer and paint that are designed for the surface.
- Applying too thick or too thin coats: Applying paint in thick or thin coats can result in an uneven or streaky finish. Follow the manufacturer’s instructions for the right consistency and thickness of the coats.
- Not allowing enough drying time: Rushing the drying time can cause the paint to smudge or chip, resulting in a poor finish. Allow enough time for each coat to dry completely before applying the next one.
- Not using a topcoat: Skipping the topcoat can result in a dull or easily damaged finish. A topcoat provides extra protection and durability to the painted surface.
- Not wearing protective gear: Painting can expose you to harmful chemicals and fumes, so make sure to wear gloves, safety glasses, and a respirator mask to protect yourself.
By avoiding these common mistakes and following the proper steps, you can achieve a beautiful and long-lasting finish on your plastic sink.
Related Questions
[faq-schema id=”2146″]
Question: Is it possible to paint a plastic sink?
Answer: Yes, it is possible to paint a plastic sink. However, it is important to use the right materials and follow the correct steps to ensure a successful outcome.
Question: What materials do I need to paint a plastic sink?
Answer: You will need sandpaper, plastic cleaner, primer, paint designed for plastic surfaces, a paintbrush or spray gun, and clear sealant.
Question: How do I prepare the sink for painting?
Answer: Clean the sink thoroughly with plastic cleaner and sand it lightly to create a rough surface for the primer to adhere to. Wipe the sink down with a damp cloth to remove any dust or debris.
Question: Do I need to use a primer before painting the sink?
Answer: Yes, it is important to use a plastic primer specifically designed for use on plastic surfaces. The primer will help the paint adhere to the plastic and prevent it from peeling or chipping over time.
Question: Can I use any type of paint on a plastic sink?
Answer: No, it is important to use a paint that is specifically designed for use on plastic surfaces. Using the wrong type of paint can lead to peeling or chipping.
Question: How should I apply the paint to the sink?
Answer: You can use a paintbrush or spray gun to apply the paint to the sink. Be sure to follow the manufacturer’s instructions for application, and allow the paint to dry completely before applying a second coat.
Question: Should I use a sealant after painting the sink?
Answer: Yes, it is recommended to apply a clear sealant over the painted surface to protect it from scratches, chips, and general wear and tear.
Question: How long will the painted sink last?
Answer: The longevity of a painted plastic sink will depend on factors such as the quality of materials used, the amount of use and cleaning the sink undergoes, and the environment it is in. Generally, a well-painted and sealed sink can last for several years.
Question: Can I paint over an existing painted plastic sink?
Answer: Yes, you can paint over an existing painted plastic sink. However, you will need to sand the surface to create a rough surface for the new paint to adhere to.
Question: Do I need to remove the sink from the counter before painting?
Answer: No, you do not need to remove the sink from the counter before painting. However, you should take care to protect the surrounding surfaces from paint drips or overspray.
Question: Can I change the color of my plastic sink with paint?
Answer: Yes, you can change the color of your plastic sink with paint. Just be sure to choose a paint color that is designed for use on plastic surfaces.
Question: How long does it take to paint a plastic sink?
Answer: The amount of time it takes to paint a plastic sink will depend on the size of the sink, the amount of preparation required, and the drying time for the primer and paint. Generally, the process can take a few hours to a full day.
Question: Can I use a regular household cleaner on a painted plastic sink?
Answer: Yes, you can use a regular household cleaner on a painted plastic sink. However, avoid using abrasive cleaners or scrubbers that can damage the painted surface.
Question: Can I use my painted plastic sink right away?
Answer: No, you should wait for the paint to dry and cure completely before using the sink. This can take up to 48 hours depending on the manufacturer’s instructions.
Question: Can I paint a plastic sink that has cracks or chips?
Answer: It is not recommended to paint a plastic sink that has cracks or chips, as the paint will not adhere properly and may worsen the appearance of the damage. It is best to replace a damaged sink.
Question: Can I paint other plastic surfaces besides sinks?
Answer: Yes, you can paint other plastic surfaces besides sinks. However, be sure to choose a paint that is designed for use on that particular type of plastic, and follow the manufacturer’s instructions for application and drying.
To wrap up
That’s our take on how to paint a plastic sink. We hope it has answered all of your queries. If you still have more questions, feel free to leave a comment below. We’ll do our best to help you out as much as possible.
On another note, we have one last piece of advice for those with old sinks: when resurfacing a plastic sink, it can be tough to paint over, so we advise applying a coat of primer before starting with the paint.
And with that, we’d like to say goodbye. Have a great day learning how to paint a plastic utility sink. Bye-bye!








![How To Clean Dark Grout That Has Turned White [5 Easy Ways]](https://homepander.com/wp-content/uploads/2021/12/How-To-Clean-Dark-Grout-That-Has-Turned-White.webp)

![How to Remove Crystallized Urine [Explained]](https://homepander.com/wp-content/uploads/2022/02/How-To-Remove-Crystallized-Urine.jpg)
